Artful Homemade Quilts Have A Way

The final two pictures of today's work are

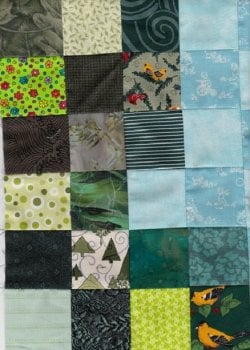
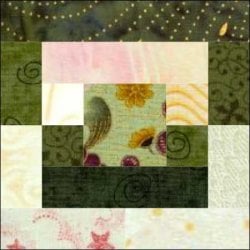
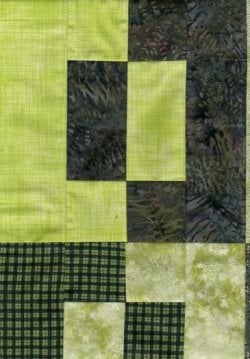
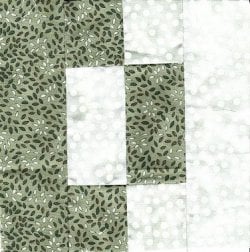
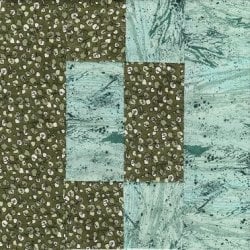
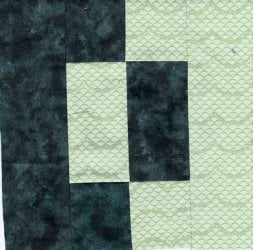
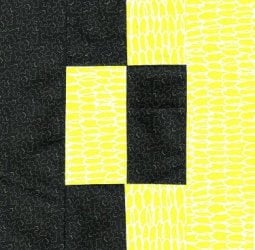
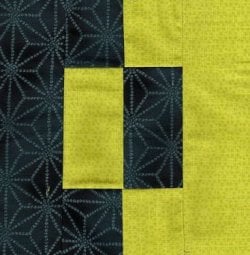
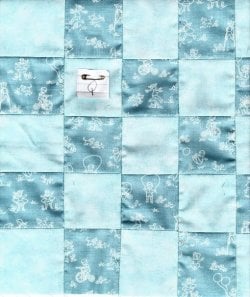
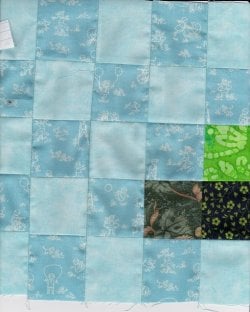
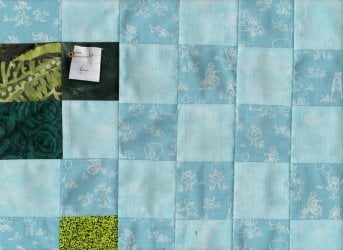
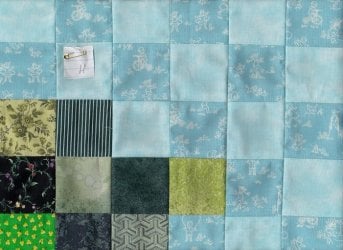
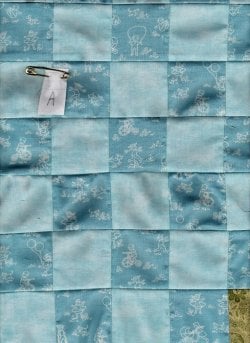
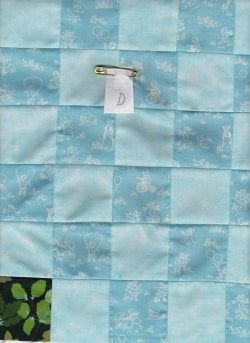
Picture 1, Square Q which is also exactly like R and T, except T adds one more vertical row of sky.

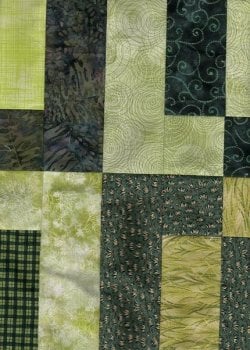
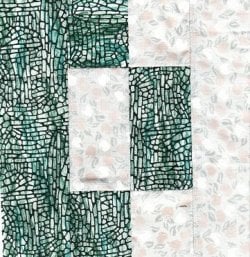
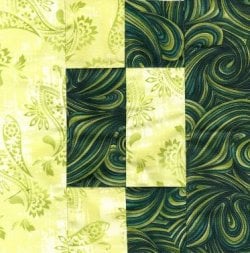
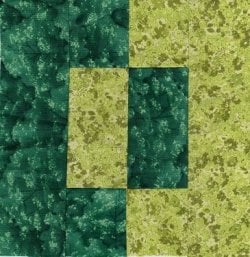
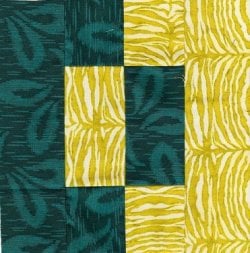
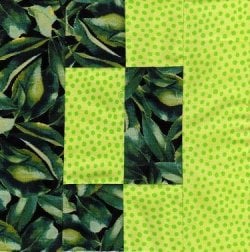
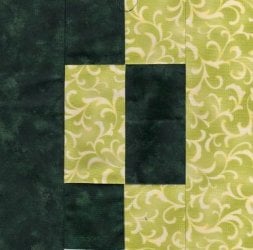
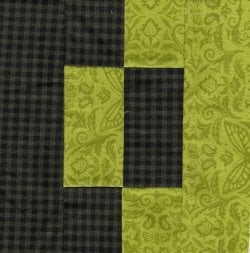
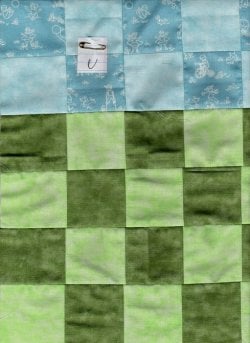
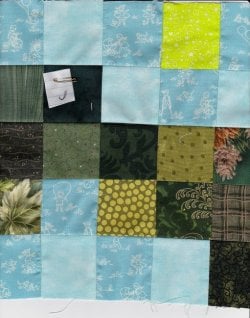
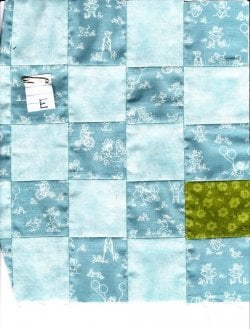
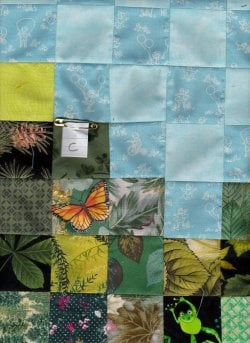
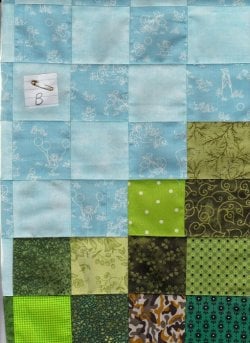
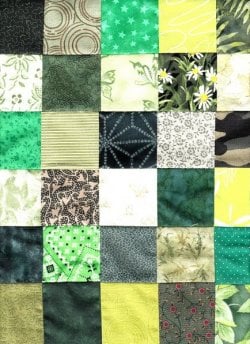
Picture 2, Square U which is also exactly like V and X, except X adds 2 pieces vertically for sky and 4 pieces vertically for grass.

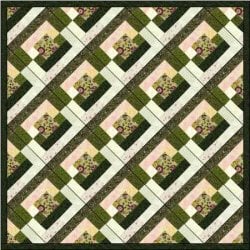
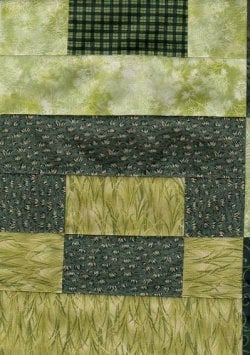
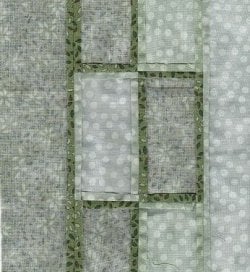
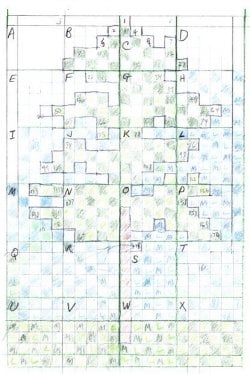
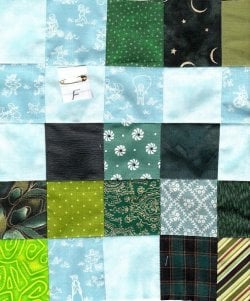
Picture 3, Schema again because the page turned.
 

Attachments

  • $pine tree12 sections Q, R, and T becki 8.20.2012.jpg
    $pine tree12 sections Q, R, and T becki 8.20.2012.jpg
    74.9 KB · Views: 19
  • $pine tree13 sections U, V, and X, becki 8.20.2012.jpg
    $pine tree13 sections U, V, and X, becki 8.20.2012.jpg
    69.7 KB · Views: 14
  • $pine tree9 schema, becki 8.20.2012.jpg
    $pine tree9 schema, becki 8.20.2012.jpg
    61.2 KB · Views: 12
Last edited:
Four more this morning, and company's coming. :ack-1:

Picture 14.......Section I

Picture 15.......Section J

Picture 16.......Section K
 

Attachments

  • $pine tree14 section I, becki 8.20.2012.jpg
    $pine tree14 section I, becki 8.20.2012.jpg
    61.6 KB · Views: 13
  • $pine tree15 section J, becki 8.21.2012.jpg
    $pine tree15 section J, becki 8.21.2012.jpg
    73.1 KB · Views: 11
  • $pine tree16 section K, becki 8.21.2012.jpg
    $pine tree16 section K, becki 8.21.2012.jpg
    96.8 KB · Views: 12
Pine Tree Quilt

Picture 17....... Section J

Section E

Section F

I'm so ready for a nap. Been sewing since 5:15 this morning. *whew*

Just 8 more sections to go! That's a good thought. That means 3/4ths of the squares on the Pine Tree quilt are done.
 

Attachments

  • $pine tree17 section L, becki 8.21.2012.jpg
    $pine tree17 section L, becki 8.21.2012.jpg
    71.7 KB · Views: 12
  • $pine tree18 section E, becki 8.21.2012.jpg
    $pine tree18 section E, becki 8.21.2012.jpg
    87.3 KB · Views: 13
  • $pine tree19 section F, becki 8.21.2012.jpg
    $pine tree19 section F, becki 8.21.2012.jpg
    83.8 KB · Views: 11
Last edited:
Completed 2 more sections, G and H, while company is here...

And it's off to one more day of museums and Lake Livingston!

Picture 1 Section G

Picture 2 Section H
 

Attachments

  • $pine tree22 Section G, becki 8.23.2012.jpg
    $pine tree22 Section G, becki 8.23.2012.jpg
    96.2 KB · Views: 11
  • $pine tree22 Section H, becki 8.23.2012.jpg
    $pine tree22 Section H, becki 8.23.2012.jpg
    78.2 KB · Views: 13
Sections A, B, C, and D Done! All the 24 squares are done, but to center the tree and make it look right, I had to have a minimum of 2 sky blues all the way around, and the same for the green grass below.

Today, I had to sew about 6 different rows back together after sewing them together wrong and having to rip and redo. It cost about 3 hours in goofups. Oh, yes. I forgot to take my medicine last night for fibromyalgia and was having merry cramps in shoulders and calves by 4 am, so I took it 8 hours later than usual and paid the price in concentration issues this morning.

Picture 1, Section A

Picture 2, Section B

Picture 3, Section C
 

Attachments

  • $pine tree25 Section C, becki 8.25.2012.jpg
    $pine tree25 Section C, becki 8.25.2012.jpg
    90.4 KB · Views: 22
  • $pine tree24 Section B, becki 8.25.2012.jpg
    $pine tree24 Section B, becki 8.25.2012.jpg
    86.9 KB · Views: 14
  • $pine tree23 Section A, becki 8.25.2012.jpg
    $pine tree23 Section A, becki 8.25.2012.jpg
    83.2 KB · Views: 14
Picture 4, Section D (top right of quilt)

I had enough greens to do a really huge row I'm adding in the middle. It will add another 12" to help the child who gets the quilt have another year or two to grow, so instead of 64" that will make it 76" long before borders are added. I sure had no intention of makin it this tall, but I just can't stand to see all these nice green pieces going to waste. I was thrilled to find another 50 pieces of green in one of the boxes, and I know there's another 100 somewhere... but not sure where that somewhere is. So, here's row XY&Z as Picture 5:
 

Attachments

  • $pine tree26 Section D, becki 8.25.2012.jpg
    $pine tree26 Section D, becki 8.25.2012.jpg
    63.6 KB · Views: 15
  • $pine tree29 Add RowZ1, becki 8.26.2012.jpg
    $pine tree29 Add RowZ1, becki 8.26.2012.jpg
    83.6 KB · Views: 14
Last edited:
Because 6 horizontal rows of 2.5" squares were added (.5" taken in seams), one more horizontal row may be necessary to answer any light or dark discrepancies that sometimes appear when the initial diagram gets smattered. Seems I had to add a 7th row at the bottom to fix the light-dark propensity to look correct. Sometimes quilters don't fix the problems as they come and leave a quilt that looks like the plan didn't work, to heck with it. I do try to avoid that impropriety when I can. Our mothers called any such effort their "obvious flaw." I already pushed that one to the max by losing my pin cushion and every corner is a thread off as a consequence. I mean, 819 obvious flaws? Nobody can top that, and I do not wish to exacerbate that with a flaw so bad it would give someone else a big headache. Not gonna do it. The quilt is 21 squares wide and 39 squares long. 21 x 39 = 819 total squares, unless I miscounted somehow. Best to get back to the machine and start sewing blocks together. I already sewed about 14 blocks together already. It's a good day. :)

Row XYZ

Picture 27 The left side of XYZ

Picture 28 The right side of XYZ

Picture 30 The right center of XYZ
 

Attachments

  • $pine tree27 Add RowX1, becki 8.26.2012.jpg
    $pine tree27 Add RowX1, becki 8.26.2012.jpg
    66.8 KB · Views: 13
  • $pine tree28 Add RowY1, becki 8.26.2012.jpg
    $pine tree28 Add RowY1, becki 8.26.2012.jpg
    62.8 KB · Views: 15
  • $pine tree30 Add RowZ2, becki 8.26.2012.jpg
    $pine tree30 Add RowZ2, becki 8.26.2012.jpg
    90.3 KB · Views: 22
The bazillions of squares are all together in a tree quilt top.

I'm very happy about it. Thanks to blu for putting a blurb in for charities which reminded me to complete the top. Now, all it lacks is a border, which I'll do tomorrow. It's late, and I'm adjusting to not using the medicine I used for leg cramps with fibromyalgia. I'm praying and am on a couple of people's prayer lists. When I feel leg cramps starting, I just stretch out on the orthopedic bed, send up a little prayer, and the comfort starts flooding in. I'm sure it was there because others are praying for me.

The quilt got a little too long because of me having extra greens. I started them into a pillow sham to go with the tree, but after reviewing my options, decided it would make a nice little center addition. The 6 rows didn't match the bottom, so I had to sew a row at the bottom to match them to the trunk half of the quilt. Then when I was getting ready to sew the top part to the upper half, that one didn't match either, so I had to sew another row, which made it 2 extra 2" rows. It's now 21x41, and a whole lot longer than I thought.

Maybe the angels knew there's a tall kid out there who will be with his mother in the shelter and needs a longer quilt due to his height. I do not know, I'm just gonna turn this in with the infant and toddler quilt and let the girls decide. If there's been a house fire in the community, someone might need the quilt.

My work is cut out for me tomorrow morning, and I will try to at least show the border. It's a monster quilt next to the smaller ones. The middle didn't come out as well as I'd have liked. Oh, well, if you look out at nature, not every tree you see will be the model for a painting or a quilt. This one is no exception, it just happened to go into a quilt top.

Have a wonderful evening everyone.

Love to all who need a hug.

becki
 
It's a happy day. Decided to do something productive with what was left of my birthday this morning and completed the top. I had to dig through a 3-foot stack of leftover green pieces to find the stripe, and I ran across an old outer fabric that is a dull ocher green in the medium light range. The reason for picking mid-range colors in the border for some of is their propensity to not show lint or dirt, and the likeliest place on the quilt to drag the floor is of course, the border edge. Mid-range colors are the secret to at least having the quilt look clean longer, and the edges usually do not touch the body and lap over the edge of the bed to keep a thermal warmth on the body. So if the floors are reasonably clean, absolute sanitation for the edge of the quilt is not as much an issue as is the interior that touches our skin. That should be quite clean and nice, too.
 
Picture 1: Border on completed pine tree quilt

Picture 2: New C-Clamp square
 

Attachments

  • $Finished Tree quilt outer border 8.31, 2012.jpg
    $Finished Tree quilt outer border 8.31, 2012.jpg
    96.2 KB · Views: 14
  • $CClamp Square1, 09.02. 2012.jpg
    $CClamp Square1, 09.02. 2012.jpg
    91.4 KB · Views: 16
Found some pictures of C-clamp quilts online. They look like the one in the book I didn't change. :)

Quilt 1 from Smoky Mountain Quilters

c-clampquilt1.JPG


It's so far the only one I found. It differs from my C quilt square in that it has 3 night-and-day rows, the large outside is made of 2 diferent fabrics (or not).The 2.5" strips measure 2" and the center is a 4.5" square that when bordered, measures 4". The reason I didn't add the 3rd row is because then, it would not fit the scanner. I may have to look through some of my several quilt encyclopedia books and see what square I really did make. Mine looks harlequin next to their multi-fabric c-clamp square which is exactly like the one I found in my new quilt book from That Patchwork Place by Nancy Martin.
 
Last edited:
There is a fix for this. I could make the squares using all those 1.5" strips I have. I'll have to think on it.
 
I think this quilt was made by Nancy Martin of Patchwork Place, and I may review her book, "A Treasury of Scrap Quilts" (I think that's the name) and make a second quilt using smaller strips of green. When I cut last week, I cut all day for four days after making two shopping trips to quilt stores for greens. I found a trove of lime greens I've been short of, since I can't find my own bucket of lime green fabrics and/or used them up some time in the past. :confused:

The red one is the inspiration for my doing this green quilt.

The green square is someone's pink and green thing (My first quilt was pink and green)

And the on-point squares were the same as the above quilt, except set in a way that will add sideways stretch to the top of the quilt. Sometimes that's good, but it's not so good if you fail to baste and stabilize the three layers of your quilt properly in its completion. I found that if I made quilts on my Nolting's Longarm, the bias from on point quilts that were not properly warped and wefted (few quilters know how to do that, with the exception of Ms. Martin who wrote books on bias strip quilting into her instructions) anyway, if they were biased to stretch N S E & W, you needed to add 8" to the 5" you usually need extra on the back of the quilt, which generally is on the weft. :)

C-Clamp Quilts:
 

Attachments

  • $c-clampquilt2.JPG
    $c-clampquilt2.JPG
    47.5 KB · Views: 17
  • $c-clamp traditional.JPG
    $c-clamp traditional.JPG
    21.1 KB · Views: 19
  • $CClamp quilt, 09.02. 2012.jpg
    $CClamp quilt, 09.02. 2012.jpg
    48.3 KB · Views: 13
After putting a group of 4 C squares together, I decided they looked like C's. I looked at several encyclopedias and could not find the same square. There are still a couple I may have missed, and at least one square I found was very similar except in the same area it had 2 extra squares. That put me in the position of temporarily renaming the square. I thought "C, Double." Then I thought "Seeing Double," <gong2> Maybe I should have just described it as "C-ing Double," because whichever way you put the square, you have 2 Cs. One seems forward and one seems backward, but when you turn the square upside-down, the one that was a backward C is a regular C,m and the one that was a C is a backward C upside-down. So C-ing Double would be a good name, and so might Seeing Double. The only trouble with Seeing Double, is it winds up in the "S" category of quilts, when it really is all about being a "C." I think I just about talked myself into calling it "C-ing Double." Any input from anyone out there? If not, it's a go until I find the same four-patch square in this peculiar alignment in or among quilting books I have not perused yet. There are much more learned quilters than me. Some have an absolute memory of quilt squares. I have a good memory, but I still look things up, and find that 80% of the time, I just got a close but no cigar name, or even a better name, but nobody else would know it, because they are steeped in the correct historical name our mothers used (for their reasons), and in quilting we make every effort to respect our mothers. Someday, someone may produce a 200-year-old piece of paper describing that square that someone did and called it after a soldier who died, in his honor or something. When that is the case, you can see why it's best to more thoroughly research names and things. But, for lack of my finding anything, I'm settling on "C-ing Double."

Here is the first 4-block, then I'm going to add the remaining 20 squares. One has a reverse picture, so it can be seen that this quilter opens seams. A lot of present-day quilters lay seams to one side, and they match well. Mine must be pinned, but I hate the way 4 layers of quality quilt fabric layers sound when crunched under the needle of a 2200 spm quilter's machine (or more stitches per inch in some cases). If the quilter uses a pair of old jeans to put under there, the poor quilter with a Long arm gets to spend upwards of $200 to have a repairman come to her house and fix her 14-foot ton of equipment. A lot of ladies are sending out their quilt machines or just aren't as sensitive to their machine's struggle to do the greatest task in sewing--sewing through 3 layers plus more layers in the case of seams. That extra layer of seam is trouble to mine ear. :eusa_whistle:

Same 16" block of 4, 3 turns:
 

Attachments

  • $CClamp quil tjunction, 09.03. 2012.jpg
    $CClamp quil tjunction, 09.03. 2012.jpg
    78.8 KB · Views: 14
  • $CClamp quil tjunction2, 09.03. 2012.jpg
    $CClamp quil tjunction2, 09.03. 2012.jpg
    72 KB · Views: 14
  • $CClamp quil tjunction3, 09.03. 2012.jpg
    $CClamp quil tjunction3, 09.03. 2012.jpg
    42.1 KB · Views: 13
C-ing Double, Square 5

C-ing Double, Square 6

C-ing Double, Square 8
 

Attachments

  • $C Double.8 09.03.2012.jpg
    $C Double.8 09.03.2012.jpg
    52.1 KB · Views: 14
  • $C Double.6 09.03.2012.jpg
    $C Double.6 09.03.2012.jpg
    49.3 KB · Views: 15
  • $C Double.5 09.03.2012.jpg
    $C Double.5 09.03.2012.jpg
    44.2 KB · Views: 12
C-ing Double, Square 7 reverse side

C-ing Double, Square 7

C-ing Double, Square 9
 

Attachments

  • $C Double.7back 09.03.2012.jpg
    $C Double.7back 09.03.2012.jpg
    37.8 KB · Views: 11
  • $C Double.7 09.03.2012.jpg
    $C Double.7 09.03.2012.jpg
    45.2 KB · Views: 13
  • $C Double.9 09.03.2012.jpg
    $C Double.9 09.03.2012.jpg
    61.2 KB · Views: 14
The reason I'm showing a lot of squares is for the benefit of people learning to quilt who may be visiting. I do my best to select a variety of visual textures, and while the ninnyhammer of too much of the same size of prints with pizazz elsewhere is going on, some of us like a dispersed feeling of "hey, what's going on here?" and that is achieved nicely by using a balance of large, small, and medium sized quilts. I have to say, though, this won't be the best example, because I stepped out of my 1.25" square box of width and moved up to two inches on this quilt. The fabrics I had generally chosen were perfect for the 1.25" strip width, so it is not known to me at this point how things will look occupying two inches instead of 5/8 of that.

I pledged 28 more charity quilts before the end of the year, and in August I only finished 2 on account of perfection and getting used to 2.5". Now that I'm over that, I can continue with larger pieces comfortably, outside my little box, and get a whirlwind going to meet my little self-imposed goal. I'm pretty happy the 72 quilts were taken by an average of 10, except for March, when all I did was crochet dishrags for the Quilter's bazaar and other fundraisers. They did not sell well because it rained the day of the sale, which was supposed to be conducted out on the sunny street. heheh! Well, that's how the mop flops. :badgrin:

C-ing Double, Square 10

C-ing Double, Square 11

C-ing Double, Square 12
 

Attachments

  • $C Double.12 09.03.2012.jpg
    $C Double.12 09.03.2012.jpg
    45.5 KB · Views: 14
  • $C Double.11 09.03.2012.jpg
    $C Double.11 09.03.2012.jpg
    39.8 KB · Views: 14
  • $C Double.10 09.03.2012.jpg
    $C Double.10 09.03.2012.jpg
    36.8 KB · Views: 10
Last edited:
C-ing Double, Square 13

C-ing Double, Square 14

C-ing Double, Square 15
 

Attachments

  • $C Double.13 09.03.2012.jpg
    $C Double.13 09.03.2012.jpg
    42.5 KB · Views: 11
  • $C Double.14 09.03.2012.jpg
    $C Double.14 09.03.2012.jpg
    34 KB · Views: 13
  • $C Double.15 09.03.2012.jpg
    $C Double.15 09.03.2012.jpg
    34 KB · Views: 14
C-ing Double, Square 16

C-ing Double, Square 17

C-ing Double, Square 18
 

Attachments

  • $C Double.18 09.03.2012.jpg
    $C Double.18 09.03.2012.jpg
    36.2 KB · Views: 14
  • $C Double.17 09.03.2012.jpg
    $C Double.17 09.03.2012.jpg
    33.9 KB · Views: 14
  • $C Double.16 09.03.2012.jpg
    $C Double.16 09.03.2012.jpg
    25.7 KB · Views: 16
C-ing Double, Square 19

C-ing Double, Square 20

C-ing Double, Square 21
 

Attachments

  • $C Double.19 09.03.2012.jpg
    $C Double.19 09.03.2012.jpg
    31.8 KB · Views: 14
  • $C Double.20 09.03.2012.jpg
    $C Double.20 09.03.2012.jpg
    49.7 KB · Views: 24
  • $C Double.21 09.03.2012.jpg
    $C Double.21 09.03.2012.jpg
    44.2 KB · Views: 26

Forum List

Back
Top