Artful Homemade Quilts Have A Way

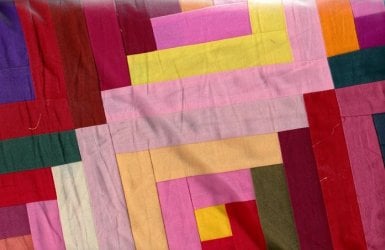
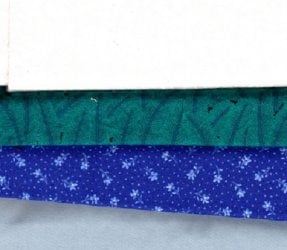
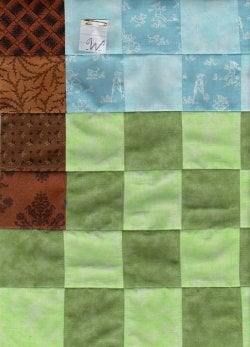
The brick red quilt was fun. Sometimes when making brick quilts, tinier strips for mortar than one inch are used. The time seems to triple and drag, not sure why. It just does. 1" strips had already been cut from late in last winter when the strips for brick red were cut, and there are enough bricks (different, too) to make another small quilt. This one measured around 50x74" according to the measurements I made. That could go an inch either way, since the quilt was folded when it was measured. One little tuck can be a half inch in error, so it is smart to add an inch when preparing to quilt such a quilt. Also, the mortar leaves error margin, too, so pressing seams open lessens the issue. Otherwise=, the quilt crumples up a bit, leaving egregious areas that when compounded, can cause issues at final press or even at quilting time, when the batting is sandwiched between the back and front of the quilt. If the front is a mess, the quilting will be, too, as a given.

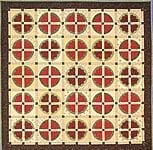
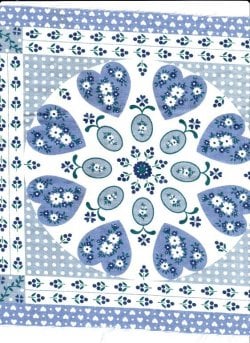
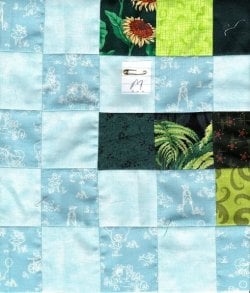
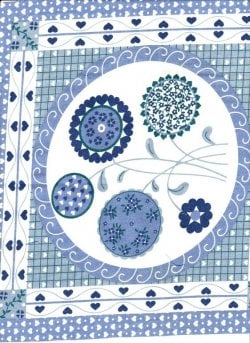
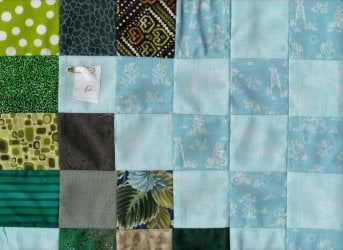
Here's a brick quilt from browsing:

A pattern with quilt kit is available at quilt photo credit page here for anyone who hates shopping and spending a lot more than is needed for any given quilt. Buying a kit can cut costs by over 50% sometimes if overestimation is made. Also, kits often use less than given yardages in quilt instruction books, with many a quilt writer adding 1/8 extra fabric in case a newbie miscuts a fabric or an experienced quilter dips into her quilt kit to make another project in a pinch before starting the quilt from which the quilt kit is cut. Only when pillows or shams to match are desired, purchasing more fabric is wise.

822_m.jpg

 
Slummin' on ebay for a watermelon quilt was fun, too. Here are some results:

$T2eC16FHJGYE9nooiKyUBQEVEUwCd%21%7E%7E60_12.JPG

Watermelon Shuffle Kit
Probably made like my Chinese coins quilts, except this one is a kit, and aren't the batiks luscious! :)

Also, some more ebay finds:
 

Attachments

  • $Watermelon Pie.jpg
    $Watermelon Pie.jpg
    11.1 KB · Views: 52
  • $Watermelon mosaic medallion potential.jpg
    $Watermelon mosaic medallion potential.jpg
    80.3 KB · Views: 24
Sometimes a pattern is so precious, you can't link their picture, and this one is worth looking at if you are into quiltmaking, and even if you're not. :)

Link to Cabbage Rose Watermelon Quilt

Another really, really gorgeous pattern is here: Incredibly talented, Leslie Beck dot com

Watermelon%20Pie%20150.jpg


I love the way her quilt has black sets in the sashing to give the impression of watermelon seeds. Talk about thinking outside the box... :)
 
Last edited:
My niece, Rosa is here. She would like to see how we scan a picture of a quilt into the files from the scanner screen. I have an old quilt top I sit on that was made like a quilt made in the thirties that was used on a quilt magazine cover, except I used my own solid color fabric in Amish technique.

Rosa says "hello, everyone." :eusa_angel:

She got to see the process of taking a quilt, placing it on the scanner, filing the scan, and pulling the file up through on USMB's Manage attachment area that is below your message screen when you are posting your reply on a thread here. :)
 

Attachments

  • $beckis 30s log cabin warm amish solids..08.06.2012.jpg
    $beckis 30s log cabin warm amish solids..08.06.2012.jpg
    50.3 KB · Views: 20
A Show from the Grand Canyon State

[ame=http://www.youtube.com/watch?v=Ce15B9203QU]"100 Years, 100 Quilts" Arizona Centennial show opens - YouTube[/ame]
 
Today, I uncovered from my little EBAY estate fabric stash purchase last month a very old piece of blended dacron/cotton that, from the yellowing in the white areas of the fabric tell me it's at least 25 years old, and possibly older than that by another 25 years. I compared it to my contemporary blues, and I have absolutely nothing in the time slot that fabric was printed, made more confusing by the fact that I only purchased 100% cottons for my quilt store of 25 years, and never blends, which are outside my area of expertise. The fabric smells old, quite frankly, so I have no idea how old. My nose came without an objective dater in its makeup.

When looking for matches, there were none in the 44 yards of blues that came in one of the four packages that matched either the yellow/grayed white nor the dusty blues. Additionally, there was a crank color that I missed the first time that I perceived to be a very dark jade green at first.

So I thought, what the heck, let's take one of the 9 blocks down to the quilt store to see what sets it off better than my little boxed pickings. The white was difficult, but the blue was impossible. However, fortunately there was just a small amount of dark blue, and one of the blues at the store while not an exact match was so in character with the dark blue on the print I brought 1.5 yards home with 1.25 yards of the off-white that while not perfect, fit the family color brought on by aged fabric. A batik (which normally is never an option with me since I like prints) caught my eye, and it had that green in the melee of its color spread, so in it went, also. I now think I can make a garden-maze style border with 3 strips to sash and set with those, and one dusty blue I picked out that was eh-close-but-not-exactly-matching in the box. That gives me four Crayons to play with, and I can surely pull another dark forest green (that my trip to the store with its daylight lights) revealed. Jade green actually knocks on the door of turquoise, but the green I have to work with was a definite forest color when I compared it to the few dark greens I found today.

Here's part of one of the squares, today's boughten fabrics, and some "maybes" from the stash:
 

Attachments

  • $03 old blue square new store matchups, 08.07.2012.jpg
    $03 old blue square new store matchups, 08.07.2012.jpg
    57.8 KB · Views: 17
  • $02 old blue blended print square, .08.07.2012.jpg
    $02 old blue blended print square, .08.07.2012.jpg
    140 KB · Views: 18
  • $01 old blue square stash matchups, .08.07.2012.jpg
    $01 old blue square stash matchups, .08.07.2012.jpg
    41.3 KB · Views: 21
Overnight, I re-evaluated the 9 squares. They're poly cottons, and I trimmed them by hand, ready to go into a small top. My thought was, "Why mix a $4 / yard blend with new $11 / yard cotton quilter's fabrics? It just didn't computer. So I went back to the Ebay "find" and found fabris, while too heavy or too light, were still within the range of what one may use in a quilt, and found similar tones in blues, whites, and that tacky dark green to make a small quilt with. I had to scrimp, but got enough to do 16 elongated quilt patches to go around 9 blocks, which I finished last night before retiring.
 

Attachments

  • $old blue squares4 sets between sashes 8.8.2012.jpg
    $old blue squares4 sets between sashes 8.8.2012.jpg
    19.2 KB · Views: 17
I found a pretty royal blue blend that will go well between long sashes--just enough to frame 9 squares if all goes well at cutting time and all the printed squares are the same size. Unfortunately, the squares are grossly offgrain, which makes them lopsided. Pairing them with 100% cotton quilter's fabric would have been a sure-fire way of getting a quilt top shaped like a parallelogram, which would not fit someone's standard quilt machine or even a hand-quilter's frame without severe modification of the frame to also be a parallelogram. :rolleyes: Or setting the entire quilt catywumpus on elongated triangles over a yard as to length and width. Think I'm thinking up nightmares? Nope. In my 25 years of owning a quilt shop, 17 of them were spent quilting people's quilt tops. Some were beautiful, but shaped like trapezoids. You can't fix stupid. If you try, the maker will think YOU messed up HER beautiful quilt top. Best thing to do is to hand it back to her with an estimate of your skilled labor and 85 hours of unripping, resizing squares, and sewing them into proper squares, how much smaller the resultant work would be. Some people don't like your frank discussion, either, but you have to do it or you could be legally liable to compensate the quilter for your turning her quilt top into the nightmare that it actually is. Your best strategy is to take pictures of the top with its measurements disclosed by laying a tape measure over the horizontal area that measures five feet, and the horizontal area that measures four feet; the vertical area that shows a length of 8 feet, and the vertical area of the opposite side that measures 9 feet.

That's a pretty messed-up scenario, but sometimes new quilters hear their friends' well-meaning but naughty little fibbie, "Oh, that little problem? It'll all come out in the quilting!"

And I have seen proportional nightmares so horrifying it made me pull out the tape measure and measure every single quilt top I quilted after that.

I have no idea of how many quilts I quilted for the public and for charities over the years, but they numbered well over 600 quilts in the 17 years of quilting prior to me getting fibromyalgia and being unable to do the physical part of machine quilting which could include standing over the quilt machine for 3 days while you pinned the quilt top, bottom, and batting to the frame, fighting weight, pull, and cutting errors made by other people or even your own mistakes until you learned exactly what you needed to do to get the quilting done properly--use good, flat, pressed cotton materials, a sharp needle, a clean machine and work area, and a dozen prewound machine bobbins in the same cotton thread as used on top. The good part was seeing people's faces who received the quilts for their handicapped day-care center, squad-car police secretary putting them in the closet for pickup by traffic cops who often are at the scene of traffic accidents where fatalities can be reduced by treatment for shock by wrapping victims in a blanket or quilt. Shock is this weird condition of the human mind that has a body suffering a harsh crash or blow that panics if no one is nearby and the shock victim perishes. A little word of comfort or just the words "You're going to be okay. Help is on the way, and wrapping him in a blanket" will save his life. I don't know why that is. I just know comforting victims of a car accident reduces casualties, and the truth be known, cops probably save as many lives as doctors do by knowing the basic tenets of shock victim treatment and use reassurance of well-being as a weapon against that person's panic.

Oh, I took the 10 finished quilts of July down to the Charity Bees closet yesterday. Some guild members were having a class on Sunbonnet Sue. A couple of the girls went out of their way to tell me how much they appreciated the quilt tops I brought to the closet. I guess I've turned in 60 or 70 tops since January. I missed March doing crocheted dishrags for the Guild garage sale of crafts, but seems I spent April through June making up for lost time. So no prizes for me on accounting this year. I just try to knock off 10 tops in 30 days, which takes a lot of each day/morning. Speaking of that, it's time to go hit the sewing machine and try to make this little polycotton nightmare into a sweetie pie quilt top for some child who will need a blankie this winter.

If you read through all my blather on this bloggy post, I hope you have yourself a beautiful rest of the day for your trouble, and possibly a determination to get out the old First Aid book and read or review the part about the phenomena of human shock in traffic accidents. :)

And here is the above-mentioned elongated 9-patch square and a couple of more of the blocks cut yesterday. If you click on the thumbnail, the first thing you might notice is using the sides for a straight-edge, that they do not fit a square paradigm but are slightly skewed. In a blend, that property does not iron out as it might on a cotton, seeming slight as 3/8 of an inch. But on a blend, It's a top disaster waiting to happen and will take all the skill I have to overcome it in piecing the sashing and borders from similarly-aberrant fabrics due to a polyester content that smart quilters avoid when possible. I grew up hating to throw anything away from my mother's stories about living through the Great Depression of the 1930s.
 

Attachments

  • $old blue squares4 sets between sashes 8.8.2012.jpg
    $old blue squares4 sets between sashes 8.8.2012.jpg
    19.2 KB · Views: 13
  • $old blue squares5 preprinted square 8.8.2012.jpg
    $old blue squares5 preprinted square 8.8.2012.jpg
    132.3 KB · Views: 15
  • $old blue squares6 preprinted square 8.8.2012.jpg
    $old blue squares6 preprinted square 8.8.2012.jpg
    123.4 KB · Views: 13
Last edited:
Finally. I can do anything else. The polymonster quilt is done! I'm free again! I don't know when I've ever drug my heels in like on this quilt. I finally just finished it in frustration. There isn't a snowball's chance you can match corners on so many different blends of polyester and cotton. The light blue polished cotton was throughout the quilt, though, and the outer border is all cotton. Those were the only two that worked out reasonably well. Everything else smacked.

To do this, I stayed up late last night until I dropped, then got up at 3 am with energy to spare to finishe it, which took 4 more hours. I have no idea how I could have sunk 20 whole hours into one quilt with cheater squares, and it hasn't even been turned over to the charity quilt girls yet.

I did grow fond of country blue mixed with forest green, however, although it has been a long time since these prints were made--70s or 80s, and possibly earlier. It's hard to tell. The forest green is almost to the jade side, and there was just enough of everything in the box to finish it. It came out about 58 inches wide and 71" long. It has over 3 square yards of surface, more than usual for my little shelter quilts.

Hopefully the girls will quilt and get it out to a needy person by the time it gets cold this winter.

Here's the final scan of the outer upper border:
 

Attachments

  • $old blue squares7 preprinted square 8.14.2012_0001.jpg
    $old blue squares7 preprinted square 8.14.2012_0001.jpg
    93.5 KB · Views: 15
Last edited:

20111d1342963648-artful-homemade-quilts-have-a-way-00001-tall-pine-needs-work-6.30.2012.jpg

On my way to the sewing machine to see how long it would take to get this baby going and done... Sew much to do! :) It's around 2:15pm. 24 hours? :eek:
 
Well, the last three hours were spent cutting 2.5" strips (to make 2" squares), cutting squares, and making this square. Also, I copied the above square onto the scanner and printed out a copy, since I wish to leave the original alone and as is. I divided the squares into 5-patch, 25 square groups so there will be 24 squares, and they are labeled A-X just because. Square in is lightly penciled in with two shades of green, indicating the attempt to keep it simple by dividing the darker greens from the lighter greens. This may or may not be a good thing, but it's a place to start.

The light aqua blue corner is a part of the sky, and I draped another piece of slightly deeper blue fabric (still pretty light) to be the dark part of the light and medium light schema carried through into the naive quilt sky. I can't find my pin cushion, and the squares are soooo not perfectly aligned this time. *sigh* Perfection is always going to be on the NEXT quilt with me. :D
 

Attachments

  • $tall pine1, becki 8.15.2012.jpg
    $tall pine1, becki 8.15.2012.jpg
    74.8 KB · Views: 13
  • $tall pine2 instruction graph, becki 8.15.2012.jpg
    $tall pine2 instruction graph, becki 8.15.2012.jpg
    45.6 KB · Views: 15
We used to have a wonderful poster here named Sunshine, but she had some health issues and eventually just left. Earlier on this thread, when she started sharing her wonderful counted cross stitch work, I became inspired to see if I couldn't someday channel charted work into some of the 1.25" postage stamp quilts. One day I was doodling on a little pad I always take to Daisy's Diner at lunch and saw a tree form onto a small sheet of paper that looked just like my favorite tall pine tree that stood directly outside the huge window. When I got home, I got out the engineering paper (gridded) and staying as true as possible to shape, replicated the tall pine that is now just a skeletal remain that will fall by this time in the next year or two as nature takes her down. I posted it here at least 3 times in the last 6 months, hoping Sunshine might come back and make some suggestions or just show something she might be working on, if her disease process allows it and she feels like doing things she's always loved to do.

That said, the quilt I'm working on is being done in the 5-patch, 25 square method I've used before (there are 10 grids to the inch on graph papers I used to work on, and I still think in "tensies" - haha this is make-your-own-word day!) In the future, I might consider either making more squares and making them smaller to fit on the scanner or work in 4x5 blocks, which fit the scanner that has an 8.5x11" surface, and 4x5 unfinished rectangles would appear as 8.5x10.5 pieces that would actually make sense. Yep. That's probably what I'll do next time. I'll demarcate the dark lines at 4x5 squares, sew out 20 squares rather than 25 squares, and that'll be a lot easier to show gridded work.

Well, until the next quilt, here are some of the squares, minus 2 inches of work on one side. Also, I'll see if I can find the instructive square where I've added more color while trying to determine if the leftmost square is a dark or a light. In quilting, that's how we get contrast. In fine work like Sunshine's charted work, you can change colors of thread. Textures in quilting are such a genius task, I don't go there. I prefer getting the tops made, and now I've lost count whether I took 60 or 70 quilts to the bees closet. I should read way back and count pictures, although some aren't posted because they were found in boxes from window samples I'd made in the 23 years of owning my own store and trying to show people fabric use ideas. A bolt would just sit there for 6 months radiating beauty, but until I lopped off a yard and made a sampler, it'd keep sitting there. By showing how to use the fabric in any number of ways, those samples sold fabric that should have sold itself if people ever made enough quilts to get an idea the next quilt is the one you challenge yourself to making a better quilt than you did this time. *sigh*

here go the squares I did today for the tall pine tree quilt. They correspond with the alphabets I drew in the 5-patch schema:
 

Attachments

  • $tall pine3 section O on graph, becki 8.16.2012.jpg
    $tall pine3 section O on graph, becki 8.16.2012.jpg
    90.5 KB · Views: 15
  • $tall pine4 section S on graph, becki 8.16.2012.jpg
    $tall pine4 section S on graph, becki 8.16.2012.jpg
    76.3 KB · Views: 14
  • $tall pine5 section W on graph, becki 8.16.2012.jpg
    $tall pine5 section W on graph, becki 8.16.2012.jpg
    50.3 KB · Views: 14
Oh, I still haven't found my pincushion yet. With all this fabric I will have to cut 2.5" squares from over 170 pieces of cloth. I think I can come up with most of it, too, as I have at least 80 huge bins of cloths, some are color-coordinated, and some are quilt starts with enough of the same fabric to complete the start. I found another start just the other day. It's hard to part with, though. I loved the clown print in it. I have a collection of clowns. I just love clowns to death. *sigh*

Here's the changes done to the schema today. Oh, my goodness, I didn't cut much as I should've today. And company is coming next week, too.

I was just thinking this morning when adding lights and darks, this quilt is acting like a huge puzzle, but maybe using a different fabric in each square will make this quilt like no other. It still isn't a masterwork of shading a much smarter quilter would plan, but hopefully the use of alternating light and dark with plane surfaces showing an explosion of visual textures will help this little quilt along. I did a tree in Irish chain style back when, thinking the Irish chain would disguise the yukky fabric I used in the quilt. <<<<gong>>>> Didn't happen. Fortunately, people just ignore ugly stuff. But for some reason the ugly fabric disappeared off the bolt. Maybe someone found the fabric a better home between prettier fabrics... sometimes people will just subliminally figure out a good plan for a fabric hanging on the wall in some obscure place in a quilt store. The fabric was a ditzy floral, brownish greens dominated. It really would have been a great fabric to use as a path, but it went into the experimental leaf area of the tree instead. Sheeze, my tall pine skeleton tree, as sad as it makes me to see it, is prettier than that darn tree quilt done all those years ago. It's infant sized and quilted, but I just didn't have the heart to give it to some poor kid as it really is that ugly.

I'm gonna faint. The Great white egret who hangs here just flew across the larger part of the lake. He seems to know when I need some eye candy. :)
 

Attachments

  • $tall pine6 updated schema, becki 8.16.2012.jpg
    $tall pine6 updated schema, becki 8.16.2012.jpg
    57.4 KB · Views: 15
1/2 inch graph paper, 16x21

If you make 2 copies of this schema by hitting "fit to page", you have a half inch grid to chart the tree (above), keeping in mind you have 2 squares of sky above the topnotch green square of the tall pine and 2 squares of grass below the brown trunk square, with 16 squares above the centerline and 16 squares below the center line.

That's all I did yesterday between bouts to the bathroom with a slight case of summer flu or something. I really wanted to cut and sew, but it didn't happen. *sigh* I'm feeling a little better today, my throat is a little less sore aches in my back. Got up early this morning and cut enough new greens to do another square or two, I think, and I was working on the sky day before yesterday which is simple. I took two tones of pale aqua blue for the sky, which looks great with the scattering of green fabrics in the tall pine tree. But I'm skeptical because that last tree quilt I made was so ugly, I may quilt something else over the top of it some time or cut it up and line a bag. lol
 

Attachments

  • $graph, half inch schema, becki 8.17.2012.jpg
    $graph, half inch schema, becki 8.17.2012.jpg
    59.4 KB · Views: 12
(This was written to a friend who told me he couldn't see a pattern on the page above.) hahahaha

I forgot to say some things about using the paper as foundation piecing. Reverse side foundation piecing can be done using one inch squares of fabric onto a paper ground. Our mothers used paper to piece difficult-to-handle works like "world without end" (a star pieced with little bitty strips) and "spider web" (a circle divided into 8 equal parts with straight lines, separated, and strip pieced. You then cut or just sewed under the curved outside piece and either added made-up pieces to make a square or appliqued the spider web onto a black, white, or other color background.

Today, we just draw lines on paper, put a couple of pieces of fabric together along a seam line, turn the paper over, sew the quarter inch seam, turn it over and press each piece out going the opposite way from one anther, rinse, repeat, all the way across. On a machine you put your stitch length at one millimeter or one-and-a-half, and that way, after the whole thing is done, the paper pops off easy. Otherwise, if the stitch is too long, it could take 3 hours to remove all the paper fragments from a 12-inch square area. That's a true pain, so the small perforations made by the machine needle if close enough together, just pop apart with little residue left behind. The other use for the paper is to transfer the design on an earlier page, which they also copy out, by charting rows 1 and 2 in alternating light and dark sky colors The next row, place tree top center square at center; Row 4, count 9 spaces, place one square in 10, 11, and 12, count 9 spaces. And so forth. It's easier to chart it visually for others. Once the spaces are marked either with a washout pencil our counted and sewn, counted, sewn, counted, sewn, etc--any method the person doing the piecing likes, it becomes a tiny postage stamp quilt of the tree in the pattern on the page preceding this one.

For this quilt, which is 21 by 64, the empty page turned sideways and used as a foundation gives you one half of the tree, say the top, and the second page, you just chart everything in the lower half of the tree picture. I left space to put two sky or grass rows both at either side and top and bottom, to center the tree, because when you bind the miniature work, it looks more like a real picture if you have a little empty space around your object. Too many things can go wrong when an inexperienced quilter does stuff. If one row was a little off, and there was no ground or sky around, you could get odd looking rectangles along the binding line and not squares. Adding space around a picture makes the binding not an issue. Who cares if a dispersive sky or grass area is a little weird? Not so if it's a picture part. Some things the eye does not forgive, and that is a bad binding on a quilt, a quilt that is six inches wider at the top than the bottom, whing-whang quilts, unquilted quilts, on and on.

When the two halves are completed, the squares will all match if you use the reverse method unless the office fairy made the squares enlarged or reduced (which my cheapy printer will not do). hahahaha, so you just match them up, sew through paper and fabric to get a whole picture.

To get finished half inch squares of fabric, you have to use 1 inch pieces of fabric, sew small stitches, and have the finished seams going all one way on the other side than you sew on lines. People who do foundation quilting could if desired do it that way. A beginner is going to tell herself, oh, why go to all that trouble, then set about to start the flawed work that only a miracle could help them finish. How do I know all this? Because I too was once a beginner, and everything that could be done wrong, I have done it, and sometimes done it repeatedly until I figured out a better way, which I teach, but which people like me, the near-unteachable artist, had to go through the rebellion process and destroy quite a little bit of fabric before learning the lessons of accuracy that smarter people just accept when told without pushing the envelope to the max.

The only other thing I can say is that the page was left blank on purpose. If you set your printer to "color" it will pick up both the blue and the dark lines, so you will have a superior separation of 1/4" squares from 1/2" squares. If you have no graph paper at home, printing the page will give you a piece to play with to chart your own design. I'll try and chart a little design now and then and sew it out from time to time, but right now, I have to keep that 30 more charity quilts before the end of the year, and it may be a cold day next January when I finally get back here to print out paper.


If you're a new quilter and didn't understand a word I said, get a good book on foundation piecing that covers at least 5 or 6 techniques, or just one on reverse foundation piecing, if you can find one. If you just hate foundation piecing, go ahead, just sew the parts together. I'm doing the 2.5" squares that way, and I still haven't found my @$%*# pin cushion yet. I have no idea, but I'm resolved this charity quilt will just have to be not too perfect. I did 4 squares and only resewed 5 or 6 pieces to fit. I'm not doing any more of that. It's ridiculous. It's only a quilt, will probably be dragged over a floor or <gulp> used once and then thrown away and burned at the dump.

See what risks we quilters take? The nicest young people in the world can take clorox to a master work quilt that took 1900 hours to make and decimate it in 6 months of use by washing bedding twice a week. Another will be handing it down with instructions to a child who preserves her quilts well, for 200 years or more. Care is everything to the quilter who did her best. OTOH, people get tired of seeing the same quilt forever, so they do tend to get rid of them after a few years, usually after a picnic they accidentally spread the quilt over ground that had a car sitting there that leaked oil all over the ground, and it wasn't discovered until somebody set a hot bowl of baked beans over the spot and set the oil color forever onto the back and into the batting of the quilt. That's why when I give a quilt away, I talk to God and ask him to take it off my hands when it is given into the possession of someone else. That way I have no emotional tie to the quilt, it's not mine any more. Yep.
 
Cut fabrics till midnight last night before vespers. It's good to remember family and friends and pray for people who need God's strength and love to get by. :)

The tall pine quilt has an ordered space of charm in the tree's greenery and trunk base. Each square of a charm quilt is different from any other in the quilt. While the sky background is done in a light and medium light aqua, and the grass is two shades of light green, I'm bolding the tree in as bright and dark greens as I can that still resembles a pine tree if you back off a little from it. I'm not sure how fading the background will work, but it's got to be better than the first tree quilt I made several years ago that was so bad, sometimes I turned it to its back, which was equally ugly, and pinned any number of unquilted pretty quilt squares on it for display in my shop for 20 years, maybe. Actually, a cork board is prettier than that quilt, hahahaha. Oh, "ve grow too soon aldt und too late schmardt." as the PA Dutch saying goes. :)
 
It was truly great to have those little stacks of bright/light green and dark greens to do squares M and P today. Also, I finished sewing up two long strips of five pieces in the two light blues picked for the sky to make squares Q, R, and T and the tops and bottoms of U, V, and X. All the grass squares and the lower portion of the sky are all done. I scanned 4 images and the tree so far. Exactly half the quilt is done, although I'm seriously considering adding two rows above the top of the schema in sky, if I have enough fabric cut.

Picture 1, Schema so far with bottom half completed in vitro

Picture 2, Square M

Picture 3, Square P
 

Attachments

  • $pine tree9 schema, becki 8.20.2012.jpg
    $pine tree9 schema, becki 8.20.2012.jpg
    61.2 KB · Views: 14
  • $pine tree10 section M, becki 8.20.2012.jpg
    $pine tree10 section M, becki 8.20.2012.jpg
    72.9 KB · Views: 13
  • $pine tree11 section P, becki 8.20.2012.jpg
    $pine tree11 section P, becki 8.20.2012.jpg
    83.9 KB · Views: 12

Forum List

Back
Top