Artful Homemade Quilts Have A Way

It was a sewing party this morning in the sewing room! ;)

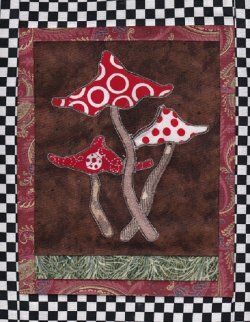
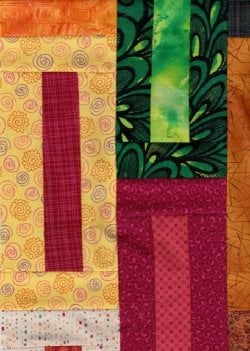
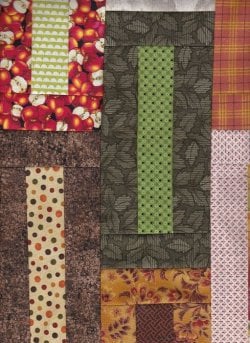
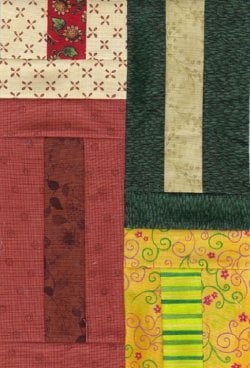
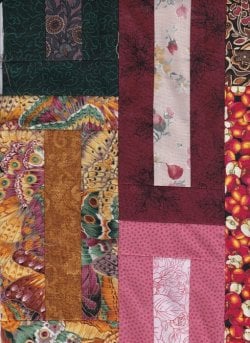
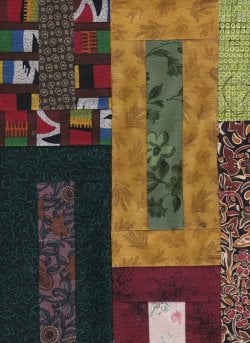
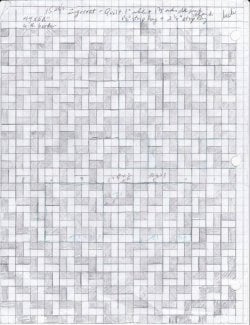
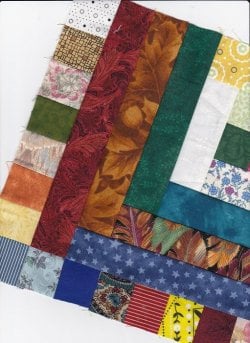
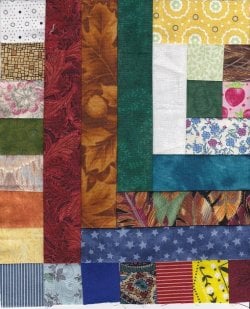
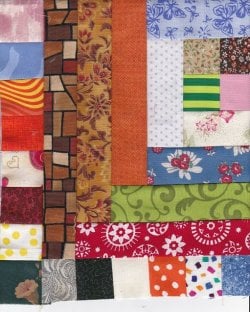
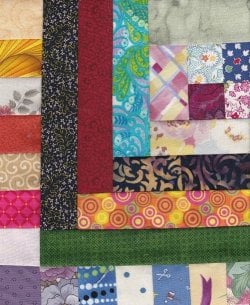
Rows 5 & 6 are done. There will be 11 rows when complete, and the inner quilt will measure 41 inches wide, give or take a half inch, and before borders it will also be 63" long. Hopefully it will measure 45x72 or better when bordered. :)


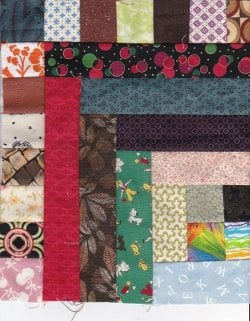
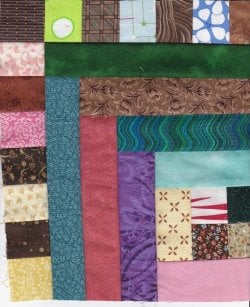
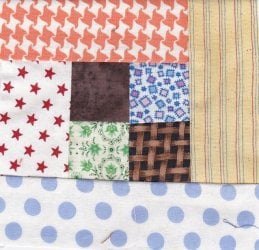
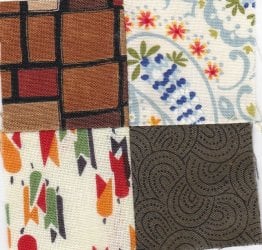
Scans 13, 14, and 15--all parts of rows 5 & 6.
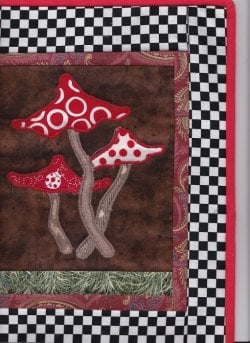
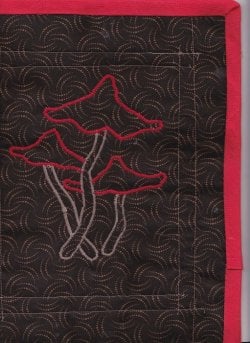
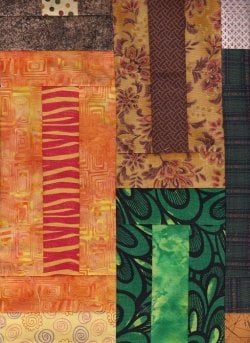
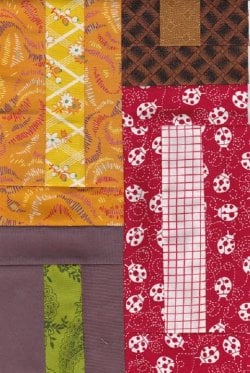
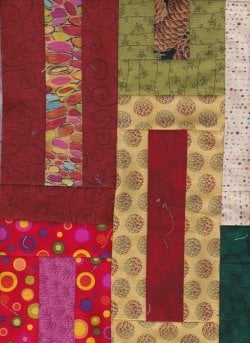
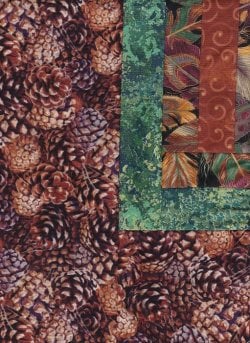
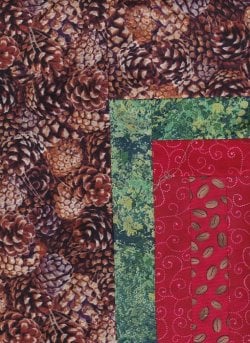
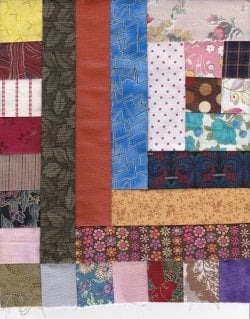
 

Attachments

  • $Giacometti Autumn13 Rows 5 and 6.jpg
    $Giacometti Autumn13 Rows 5 and 6.jpg
    111.8 KB · Views: 42
  • $Giacometti Autumn14 Rows 5 and 6.jpg
    $Giacometti Autumn14 Rows 5 and 6.jpg
    78.8 KB · Views: 36
  • $Giacometti Autumn15 Rows 5 and 6.jpg
    $Giacometti Autumn15 Rows 5 and 6.jpg
    105.9 KB · Views: 38
Scans 16, 17, and 18.

These tall rectangular blocks constitute Rows 5 and 6 of what will hopefully be 11 vertical rows with a border. :)

It's taking between 8 and 12 hours to do a pair of rows. :eusa_eh:

That's way too long for something that looks so simple, but making 6 squares where one is used means saving squares back to coast at a later time, doing 5 or 6 more quilts. I'm so loving this autumn-colors work. The china berry trees turn red at different rates, and they're just now looking like rusty nails from a difference. If all the leaves were red at the same time, they would look like Japanese maple color. :)

And the egret was back on the lake early this morning after having disappeared from view for a couple of weeks. It's a beautiful day, but we're still seeing a lot of green on the trees.
 

Attachments

  • $Giacometti Autumn18 Rows 5 and 6.jpg
    $Giacometti Autumn18 Rows 5 and 6.jpg
    107.5 KB · Views: 44
  • $Giacometti Autumn17 Rows 5 and 6.jpg
    $Giacometti Autumn17 Rows 5 and 6.jpg
    118.7 KB · Views: 39
  • $Giacometti Autumn16 Rows 5 and 6.jpg
    $Giacometti Autumn16 Rows 5 and 6.jpg
    123 KB · Views: 39
Only finished one row yesterday, will post pictures when both 7 and 8 are done. :) The Giacometti Autumn quilt is very labor intensive due to making 6 rectangles for every 1 that goes in the quilt. That way, I'm building a ready reserve for nonstop sewing another year on Charity quilts or whatever. :)
 
Last edited:
Rows 7 and 8 will be going where rows 1 and 2 are now. I've been affected by putting the cart before the horse twice today already, might as well... :rolleyes:

Fave: camo in #3.
 

Attachments

  • $Giacometti Autumn 19 Rows 7 and 8.jpg
    $Giacometti Autumn 19 Rows 7 and 8.jpg
    113.4 KB · Views: 40
  • $Giacometti Autumn 20 Rows 7 and 8.jpg
    $Giacometti Autumn 20 Rows 7 and 8.jpg
    77 KB · Views: 35
  • $Giacometti Autumn 21 Rows 7 and 8.jpg
    $Giacometti Autumn 21 Rows 7 and 8.jpg
    90 KB · Views: 38
Last edited:
The rest of rows 7 and 8

Now, off to do rows 9, 10, and 11. It took all night last night to cut and all day today to do two rows. <huff, puff, huff, puff>

There are enough warm colors in stash to make it 8 long instead of 7, but that would require ripping and redoing.. Nope. The next one will be longer and have more textures and fabrics.
 

Attachments

  • $Giacometti Autumn 24 Rows 7 and 8.jpg
    $Giacometti Autumn 24 Rows 7 and 8.jpg
    96 KB · Views: 40
  • $Giacometti Autumn 23 Rows 7 and 8.jpg
    $Giacometti Autumn 23 Rows 7 and 8.jpg
    81.7 KB · Views: 35
  • $Giacometti Autumn 22 Rows 7 and 8.jpg
    $Giacometti Autumn 22 Rows 7 and 8.jpg
    90 KB · Views: 37
Last edited:
99 bottles of beeronthewall, 99 bottles of bieeeeer... Yep, It took a day of work, and a day of face-palming to keep going on this little project. Thanks to pbel for the day-brightener the other day, or I'd still be hitting the wall ...

I only sewed rows 7 and 8 upside down for sheer meanness, too... :lmao:

I'm considering blindfolding mesel' for Row 11, the LAST ROW OF THIS FRICKING BRICKING QUILT. <empty threat> *sigh* Actually, I've loved every minute of this quilt, good and bad. (lots of bad, finally just decided to go with the flow, like a prisoner who didn't commit the crime for which her heart is incarcerated) ... :D ... all for the children in the shelter who need a little blanket to keep them warm at night.

Scans 25, 26, and 27 of rows 9 and 10:
 

Attachments

  • $Giacometti Autumn 25 Rows 9 and 10.jpg
    $Giacometti Autumn 25 Rows 9 and 10.jpg
    95.8 KB · Views: 37
  • $Giacometti Autumn 26 Rows 9 and 10.jpg
    $Giacometti Autumn 26 Rows 9 and 10.jpg
    107.1 KB · Views: 44
  • $Giacometti Autumn 27 Rows 9 and 10.jpg
    $Giacometti Autumn 27 Rows 9 and 10.jpg
    99.3 KB · Views: 46
Also, Rows 28, 29, and 30.
 

Attachments

  • $Giacometti Autumn 28 Rows 9 and 10.jpg
    $Giacometti Autumn 28 Rows 9 and 10.jpg
    113.3 KB · Views: 36
  • $Giacometti Autumn 29 Rows 9 and 10.jpg
    $Giacometti Autumn 29 Rows 9 and 10.jpg
    112.8 KB · Views: 37
  • $Giacometti Autumn 30 Rows 9 and 10.jpg
    $Giacometti Autumn 30 Rows 9 and 10.jpg
    106.8 KB · Views: 40
Wow, this is the 5th day in the last 7 days I worked to past midnight the night before. What a chore. But there is a reward for hard work--the joy of getting something finished and giving it to a child in a shelter who needs a quilt and affirming love from at least one parent who cares about them from sunup to sundown till they're out of the nest. We're not so different from birds who care for their young and teach them to fly, how and where to get food, and how by example to build a home away from predators who would eat them. Wrapping a child in a pretty blanket to keep them warm at night is how a parent conveys approbation of that child's existence, the most important gift one can give. The child remembers the look of love on the parent's face and nighttime prayers said that unify the family in love and acceptance.

Praying for the children of the world to have loving parents who shelter them from the cold of winter.

The last row was done yesterday, the borders were a happy accident. The green 2" strips were cut so long ago, I have no idea what they were to have been used for, except they could have gotten stashed in a place as we were moving that escaped my notice in the 200 boxes and 150 tubs of fabrics I brought to sew charity quilts for the rest of my life from Wyoming, where I left the care of it in Christian hands and told the girls to use the business to draw a paycheck and to serve God as best they could from works done in the store and bringing beauty to women of good imagination and pluck. From what I hear, they've made a lot of quilts locally for hospice and those in need, and I'm at rest with that decision. :)

Am including my own notes on the Ziggurat quilt of divisions in which to complete it. not quite but almost all the strips are done, they just have to be cut into 3 inch segments. I just guess I had turquoise overload and just set it aside. That happened with the pink ziggurat quilt several months back. That's too much of one color for too many days is not necessarily a good thing...fatigue of color sets in, and you need to replenish your juices with another color splash. A better plan might be to use the color wheel to go around, that goes on a continuum in magenta, red, orange, yellow, green, turquoise, blue, and purple doing one in each color with every other phase throwing in a brown quilt alternated with a white-to-black values quilt or even - horrors - a black and white optical art quilt that makes people dizzy. :muahaha:

Oh, it's all good. :D
 

Attachments

  • $Giacometti Autumn 31 Row 11, Borders.jpg
    $Giacometti Autumn 31 Row 11, Borders.jpg
    128.9 KB · Views: 36
  • $Giacometti Autumn 32 Row 11, Borders.jpg
    $Giacometti Autumn 32 Row 11, Borders.jpg
    127.5 KB · Views: 39
  • $Ziggurat Worksheet.jpg
    $Ziggurat Worksheet.jpg
    99.8 KB · Views: 47
Last edited:
I've been tossing scraps around for a few days, and the pile of scraps is 36x12x10" and needs to be 0x0x0. I'm thinking there's a couple of quilts there, and am busily working on a way to use some of the 1.75" strips up. It started off with using the smallest 1.75" bits to make squares, coupled with lights and darks and other "twosies" reversed and sewn together as light and dark centers and made into light chambers with a log cabin row of lights all the way around the 4 patches. All the squares are 1.75" as are the strips, left over from the Giacometti autumn and many other quilts I have made using 1.75" strips that finish out to 1 1/4" strips, which has a pretty look to my eye since I've made so many postage stamp quilts from that size after purchasing an inexpensive postage stamp quilt at an antique store for a song one day in Casper, Wyoming. She was going out of business, and just wanted to get rid of stuff she couldn't sell. The reason she couldn't sell it is that it was 6' long (which is ok) but it was only about 26" wide, and used something other than batting in the middle, maybe gauze? Anyway, in cold country, thin quilts aren't warm, and the fabrics were definitely late 30s or early 40s, as was the backing. It could have been made from clothing scraps, they're all cotton, so it was prior to the late 50s and early 60s when dacron polyester was all the rage. There isn't a drop of polyester in any of the fabrics on the little quilt I purchased.:eusa_drool: 
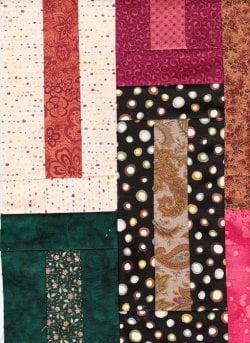
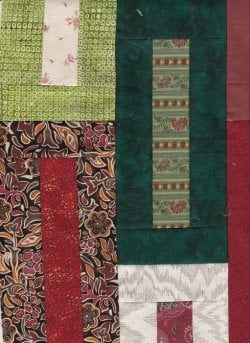
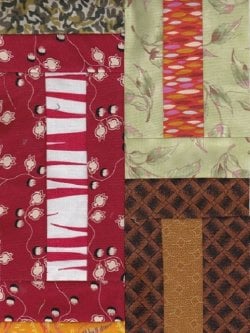
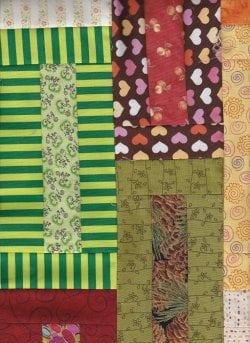
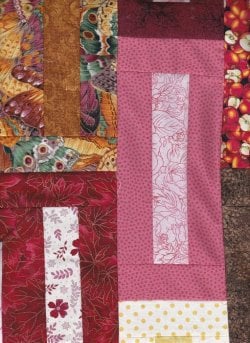
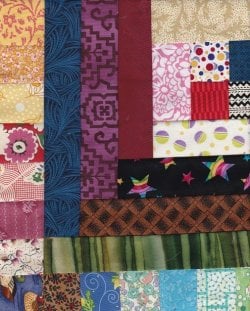
Also, it's not a master work with centers being up to 1/3" off here and there, oh, and did I mention it? Not all the squares are exactly the same size, but the average of them is a finished 1.25" (1 1/4").
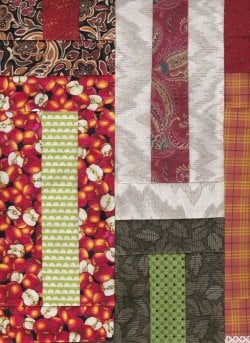
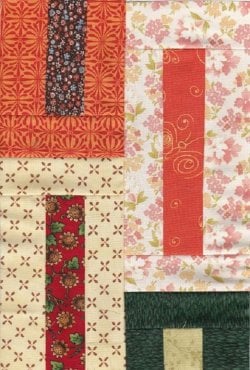
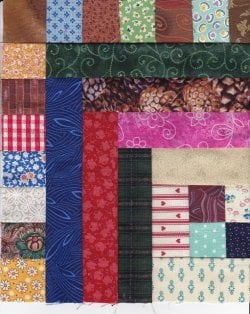
Anyhow, I have 30 center 4-patches done and worked 3 of the squares up this morning while cleaning up the last row of the Giacometti Autumn quilt's extra rectangles for future quilts. So work never seems to end after one is done, work is the energizer bunny of quilting it seems.

To all a good morning. I'm have a touch of stomach flu or something after going out once this past week. You catch whatever is even thinking about going around with the damage fibro does to your immune system. Bless all those who are getting over something, and a reminder to you to get your flu shot if you do such things.

Here's the start of the Echo Chamber Quilt. I have a plan forming in my mind already about setting these squares, but it may not come to fruition due to this quilt needs to have a finish point somewhere in the next few weeks. I just wanted to see what a quilt of these squares would look like. I've never seen one done like this, and as I said, there's more to this than I have completed yet.

Stay well everybody. :)

Love,

becki
 

Attachments

  • $Echo Chamber Quilt Basic Blolck 1.jpg
    $Echo Chamber Quilt Basic Blolck 1.jpg
    104.5 KB · Views: 39
  • $Echo Chamber Quilt Basic Blolck 2.jpg
    $Echo Chamber Quilt Basic Blolck 2.jpg
    101.3 KB · Views: 39
  • $Echo Chamber Quilt Basic Blolck 3.jpg
    $Echo Chamber Quilt Basic Blolck 3.jpg
    91.2 KB · Views: 42
How tos of working on the Echo Chamber Quilt. All strips are cut 1 3/4" wide. When quarter inch seam allowances are used, the ending width of the strip should be consistent in size, and the recommended size using a 1/4" seam allowance is 1 1/4 inches. :)

You start with a basic 4-patch with darks and lights alternated (Scan 1)

Then you build a strip around the essentially resultant three-inch four-patch using light strips cut 3 inches, 4 1/4", 4 1/4", and 5 1/2" that encases your basic 4-patch. It should measure 5 1/2" square at this point. (Scan 2)

Then you echo the chamber on the two lower edges, leaving the 5 1/2" light and its 4 1/4" neighbor, open. the first edge dark measures 5 1/2", second and third measure 6 3/4" fourth and fifth measures 8", and the final outside sixth dark strip is cut 9 1/4", then sewn. If you cut exact measurements using a consistent 1/4" seam allowance your square will be right and you'll wonder why you ever did log cabin sewing any other way if you have done hit-and-miss all your life on them like I did before I wised up to "Oh! It's less trouble and saves you half your time if you precut strips before you start sewing!!!!!!!" :rolleyes: I swear, I have made 100 of these log cabin quilts, and I didn't really figure it out until about quilt #55. I've made 10 log cabin quilts just this year, tucking in one here and there every time I take 10 quilts down to the Charity bees, I like one or two of them to be log cabins, just because they're so wonderfully homey and cuddly to the person who gets one. It looks like someone worked their butts off making it too, because they did. After the 6th echo log, the square now measures 9 1/4".

Sew one square first and see to it that it measures out okay. The final square is 9 1/4" exactly, on all 4 sides. If not, your quarter-inch seam allowance needs work. Even when you have a 1/4" foot, sometimes your sewing is not consistent with the designer's 1/4", and you need to do something about it.

May I make a suggestion? First, be patient and be certain you have a seam ripper that can go under a two-millimeter stitch without ripping the cotton fabric. Press the seams outward before adding the next strip. It pays to do only one square first and waste a little thread, to get your measurement down pat. If you're still not sure, do another independent square. You'll know right away if you are measuring your strips first before adding them to your square. If the three-inch piece on the chamber is added to a side, and it's longer than the four-patch side, your seams in the 4-patch are likely too large. Aren't you glad you only did one instead of all 32? :muahaha: I know how to rip 32 consecutive squares apart! I probably should have just put them in the senior-pillow stuffing bin for support quilts (all your strips and cotton threads are the best fillers for a tough-support pillow that a senior can use to elevate his or her feet and not go mushy on them. It really means a lot to those who have swollen feet at the end of the day to have a pillow that can be placed on the foot of the bed and will reliably elevate the foot 4 or 5 inches. It takes me 3 months of steady sewing to accumulate enough of that kind of scraps to stuff the pillows with. In a pinch, if the senior center is begging for sturdy pillows once the seniors tell them how good they make their feet feel at night, you can fill the demand by standing up at announcement time at church and requesting clean, used bath towels you can cut up and put in your pillows. The ones that don't have holes in them make good "batting" for the outside of the pillow that prevents pokies from protruding here and there making uncomfortable welts. Don't forget to tell them your pillow does not replace the wonderful care of nurses and their aides to change positions on the more indigent of the people in their care that prevents bedsores. All your hard work is for naught if that isn't done. Let them know their nursing care is more important than an old pillow, and you can bet your seniors will get the best tlc in the world. We mustn't forget to thank and promote the care giver when we can. They're the solid gold of good health for seniors, and that's not a statement, it's a fact. On I go :blahblah: :D

Oh, if you read the link description, it tells you the measurements or vague description of what to do. Just put your mouse arrow over the thumbnail, and the description will pop up in a short moment or two. Click on the thumbnail, and you can see the fabric surface textures better. Half the fun of picking the right strip to go here or there is varying the size of the patterns in a random way. For girls it's more fun than dressing a baby doll when you're 5 or 6. For guys, it would be a challenge to using everything you thought you learned in art school and opening a new world into management of surface texture. And if you never went to art school, well, just go right ahead. Just one thing: no ripping out bad decisions. Once you make the decision, that's where your skill is in time and space. It won't even hit you until after the quilt is done. Then you learn to be wiser on the next quilt. I always told my students, it's better if you make mistakes. You can correct mistakes next quilt. If you never made any quilt errors, you'd never learn what you should not have done and build a better construct the next time. Never hurts to get a tablet of quadrille paper in the office section where papers are purchased. It can make the difference in hating a design and loving it because you followed the plan and stuck to it with skill and assurance.
 

Attachments

  • $Echo Chamber Quilt3 How to 1.75 in dark strips echo chamber.jpg
    $Echo Chamber Quilt3 How to 1.75 in dark strips echo chamber.jpg
    161.5 KB · Views: 35
  • $Echo Chamber Quilt2 How to 1.75 in lights 4 chamber.jpg
    $Echo Chamber Quilt2 How to 1.75 in lights 4 chamber.jpg
    123.8 KB · Views: 37
  • $Echo Chamber Quilt1 How to 1.75 in. squares together to 3 in..jpg
    $Echo Chamber Quilt1 How to 1.75 in. squares together to 3 in..jpg
    147.8 KB · Views: 35
Last edited:
On the edges of the echo logs, on this quilt are squares, just because. Attaching the wrong kind of lace onto a quilt edge can be a miserable experience before or after the quilt is laundered the first time. So build in lace by adding stuff! That's why this one has squares at the edge. I'd never done one in all those 100 other log cabin quilts made like this one, although I'd chambered a few 40-patches on one and I've made echo log cabins before that emanate from a single square at the corner to the bottomest rung.

Make a row of 7 joined 1.75" squares as follows beginning and ending with light squares:
light, dark, light, dark, light, dark, light

For the outer row, make a row of 8 joined 1.75" squares, placing the very darkest at the right side of the row to anchor the "lace" squares as follows:

light, dark, light, dark, light, dark, light, dark

Sew edges on joining 7 first, then joining 8. Your square now measures 10 1/2" (10.5 inches) on all 4 sides See why you must have a true 1/4" allowance in your seam area? Without that consistent seam, things don't match up well. If you are patient, you will master the 1/4" seam before you finish this quilt.
 

Attachments

  • $Echo Chamber Quilt4 How to 1.75 in squares, 15, onto echo.jpg
    $Echo Chamber Quilt4 How to 1.75 in squares, 15, onto echo.jpg
    91.7 KB · Views: 37
The Echo Chamber blocks are:

Scan 1 - block 4

scan 2 - block 5

scan 3 - block 6

32 blocks placed 4 x 8 would give you a cot sized covering that measures 40" by 80" before adding borders.

If you do 40 blocks, 5 x 8, your couch potato cover will measure 50 by 80 inches, more or less, prior to a 2 and a 4 inch border addition which would increase the size to 62 by 92. If that's too large, you can use it on a bunk bed. Great for growing kids. :)
 

Attachments

  • $Echo Chamber4 Quilt Basic block.jpg
    $Echo Chamber4 Quilt Basic block.jpg
    94.9 KB · Views: 40
  • $Echo Chamber5 Quilt Basic Block.jpg
    $Echo Chamber5 Quilt Basic Block.jpg
    96.9 KB · Views: 35
  • $Echo Chamber6 Quilt Basic Block.jpg
    $Echo Chamber6 Quilt Basic Block.jpg
    101.4 KB · Views: 33
Just sharing some happy pics of Thanksgiving, hope it's a glowing good day for one and all.
 

Attachments

  • $CornucopiaThanksgiving.jpg
    $CornucopiaThanksgiving.jpg
    29.6 KB · Views: 42
  • $happy_thanksgiving4.jpg
    $happy_thanksgiving4.jpg
    23.9 KB · Views: 105
  • $Happy-Thanksgiving 5.jpg
    $Happy-Thanksgiving 5.jpg
    10 KB · Views: 3,141
The Echo Chambers Quilt is in the messy morass stage.

The quilt room is a mess,

The floor's a mess,

The sewing table is snowed under with bits of cloth from stashes here and there.

This morning's progress was to get about 40 squares having little chambers around the light-and-dark four-patches, so they all go the same way at the end of the day. Building in unity to scrap quilts is a challenge, but by making 3 or 4 squares, it's easier to avoid error traps that bring a confused look to the work. While sitting around gadding about USMB today, I just got up and went back to the sewing machine and tapped out another bunch of logs onto the incompleted remainder until I'm pretty much up to the 8-inch strips. After that, it's 9 1/4" strips and one final 10 1/2" strip before adding the squares "lace" half round.

Cheers to a unified quilt that is so together, nobody notices the work, they just love sleeping under it "for some reason" that may not penetrate the conscious mind.

I found a dull black moda marble that was probably printed to go along with vintage prints of the antebellum era. It resembles old-time hand dye, except is more gently marbled than hand-done stuff was.

Only one square was finished with little squares at the half round area at the bottom. That's the most time-consuming row, and there are probably 35 left to do, although I have not counted the squares yet, though I suspect it's somewhere between 35-45. When I do complete and count, that will help me determine the size I want to cut the setting dull black marble fabric. Assessing the amount of material you have to set and how much it will take with 1/4 yard left to spare is a good rule of thumb.

Sew, it's back to the machine! ;)
 
Last edited:
No kidding, the work has been 8 to 10 hours a day on this marathon quilt. Why me? Why do all these quilts lately gobble time like a drunken sailor swizzles down more suds? Today was to have been the day 40 blocks were neatly done and would neatly make this neat little 5x8 quilt, when much to the horror of my sensibilities, on counting, there were 44 squares. :rolleyes:
So now, it's "How do we get 2 or more quilts out of all these squares? Well, I could make 4 more squares for a total of 48, make 2 4x6 block quilts (24 each) with wider sashes and settings OR heck with settings, just cut big 10.5 blocks of interesting cloths children might like and set them alternatively with 8 blocks on point for 6 very nice-sized crib quilts... on and on with silly ideas. Or I could go ahead and make it 5x8 and use the 4 leftover squares to start another series in which I could use them like the 10 or 12 hero stars quilt I made from narrow-logged (1/2" logs) during this year's series of quilts for the shelter, only use these hobo lace squares as the starting point for medallion quilts of that order (a medallion quilt is one with a large focal center that is embellished with in-the-round style borders, say one as bricks, another 4-sided border of cute appliques, another of half square triangles as a sawtooth border, a row of geese for fun, etc. You can do anything with a good medallion center, and it might be fun to make a series of them like the hero star 1/2" log stars that would have gone into a large quilt if I hadn't been so ill prior to parathyroid surgery 2 years ago and thought I was a goner for sure. Well, demise didn't happen, and God has blessed me with another life like Job after all those troublesome pain years. :blahblah: Sorry, I just got wound up. :lmao:

here are 3 of the 44 Echo Chambers with their silly Hobo Lace squares at the bottom of the echo logs:

I know what. I'll write a book called "Hobo Lace," and make a passel of quilt tops and pay someone else to quilt them for my book. Who will quilt them? *sigh*

Again, 3 of the blocks just finished this morning:
 

Attachments

  • $Echo Chambers With Hobo Lace Square 1.jpg
    $Echo Chambers With Hobo Lace Square 1.jpg
    96.5 KB · Views: 40
  • $Echo Chambers With Hobo Lace Square 2.jpg
    $Echo Chambers With Hobo Lace Square 2.jpg
    94.3 KB · Views: 40
  • $Echo Chambers With Hobo Lace Square 3.jpg
    $Echo Chambers With Hobo Lace Square 3.jpg
    100.7 KB · Views: 32
Almost done with sb's little mushrooms. Pbel and I are trying to inspire her to complete her stained glass mushroom that will be so beautiful and add so much to wherever it hangs. We hope she bites the bullet, pays for the darn copper, and finishes her work. It's truly too cute for words, and we other artists think she should just do it. :lol: Pushy, aren't we. :lol::lol::lol:

Well, I'm having my own problems with equipment. I decided yesterday, I couldn't live with this awful canon printer because it's too small to show stuff and I don't do cameras, and my husband's dementia prevents him from doing cameras since we moved 3 years ago, so I have absolutely no record of the full quilt tops I do around here. :evil:

So yesterday I went to two discount places to get one that copies 11x17" papers. Did I get one? nooooooooooooo. The discount houses don't want to sell 11x17" copiers any more, so they keep them in warehouses two states away if they have them at all! :evil: So, I guess I will have to bite the bullet and buy one online or drive to Houston. Haven't decided yet, but there isn't one for sale around here, period. Sorry for showing partial photos, but I'm stuck with my $29 canon bought on sale last summer. So, fiddlesticks, here's a partial picture of bones' dancin' mushrooms with the hopes she will finish her project and take a picture like normal people do and show it at her thread (That's a reflection on my laconic approach to learning to use and operate a camera again after being spoiled for 20 years, and not on strollingbones):

(the back is 2/3's done. It takes a couple of hours to tailor's blindstitch the binding to the back of the miniature quilt once it's pinned on)
 

Attachments

  • 95.3 KB · Views: 33
Last edited:
Oops! Wrong picture (above) That one shows the unfinished work.

The satin stitch is showing here:

Scan 1 front

Scan 2 back
 

Attachments

  • $Dancin Shrooms finished front.jpg
    $Dancin Shrooms finished front.jpg
    91.4 KB · Views: 43
  • $Dancin Shrooms finished back.jpg
    $Dancin Shrooms finished back.jpg
    88.9 KB · Views: 44

Forum List

Back
Top