Artful Homemade Quilts Have A Way

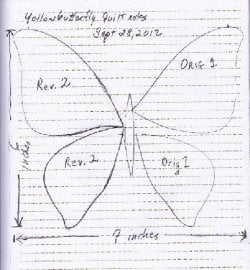
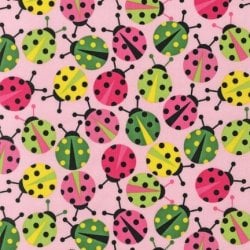
The next step is to actually go cut out 30 8.5" squares of a fabric that likes butterflies, and in particular, bright yellow or chromium yellow (to the green bright) of the common sulphurwing. The butterfly shown above is the orange-barred sulphur, so he is to the Cadmium yellow in overall appearance, which may be why someone would create a website called "20 most beautiful butterflies in the world" and include the lowly sulphur wing and in particular, that cadmium yellow color that shouts "I'm here!"

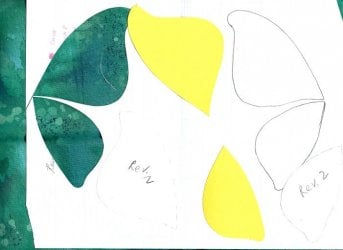
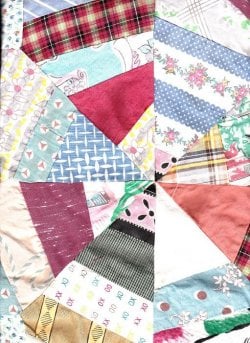
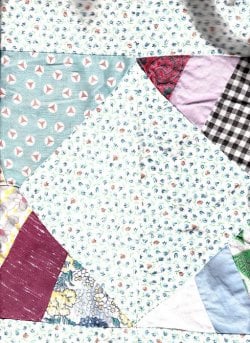
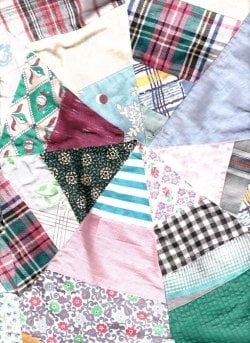
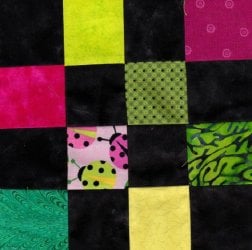
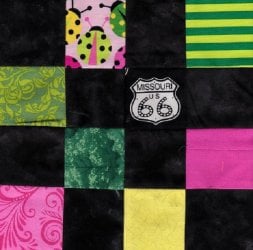
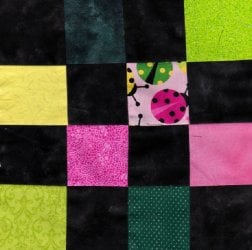
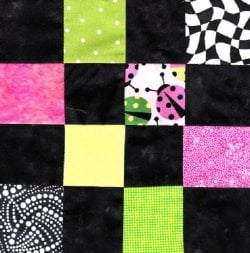
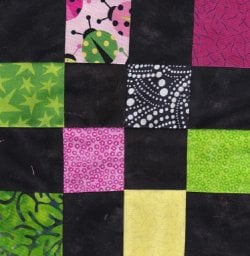
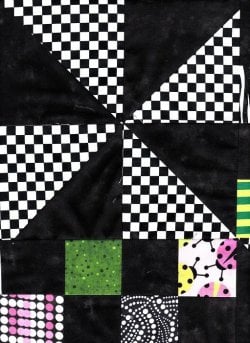
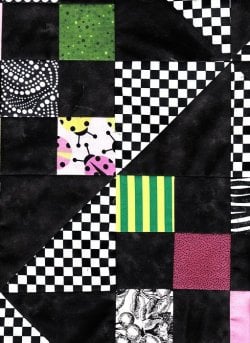
So, It's off to see the stash wizard and try to come up with a pleasing remedy to the next issue: picking fabrics for the quilt. I have so many, I'm going to limit it to what I have on hand. This was gonna be "turquoise" month, and I even bought the fabrics. But along flits a sulphurwing, and what can I do but have my eyes follow him? :dunno: Be back hopefully within an hour with an 8" mockup of this revised Yellow Butterfly idea.

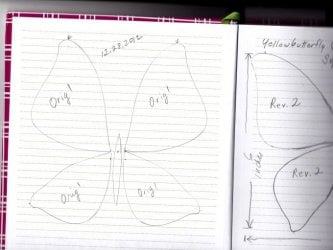
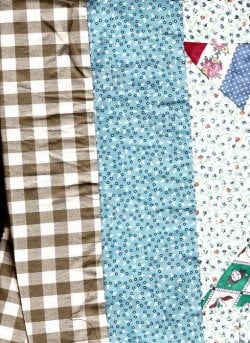
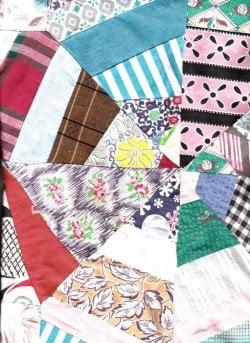
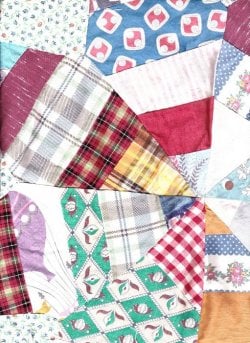
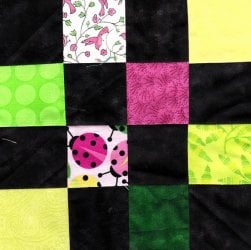
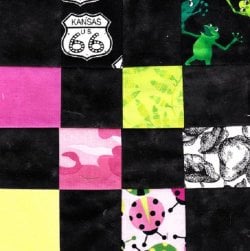
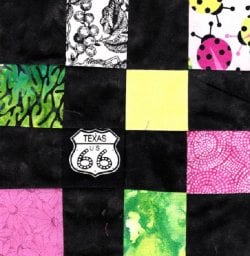
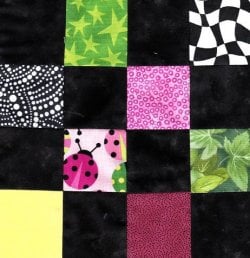
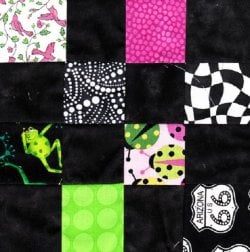
Edit: Oh, we just turned a page, so I'm adding the pics to be on the same page:
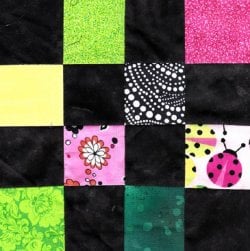
21403d1348845126-artful-homemade-quilts-have-a-way-wmbb-orange-barred-sulphur-phoebisphilea-far-southern-states-to-rare-sightings-in-wisconsin..jpg


21404d1348845126-artful-homemade-quilts-have-a-way-revised-butterfly-design-process.jpg


21405d1348845126-artful-homemade-quilts-have-a-way-revised-butterfly-design-process-iii.jpg

 
Last edited:
Second trials are good. They show you things you missed the first time. I still cannot get much into fabrics until you see the problem. I placed the templates on a page (Scan 1, Orig 1 and Rev. 2) Something wasn't right.

So, I promptly touched the bottom and top and got yet a gaggier outcome (Scan 2). Call it subjective, but everything in me said "I can't stand this layout." So, I changed Orig 1 into Rev. 2, which placated the wider look (7 inches, total). That means my Yellow Butterfly will have to be wider than taller. I didn't even bother to measure the outlay on Scan 2.

Scan 3 is the new yellow template placed on cutout graph paper under fabric that is green-blue-green. It may or may not be the final choice. I have a yard of several other greens, but thought the greater contrast would be this one. Contrast is not all, however. Color choices go through the same process as the placement choice. One panacea works for me: if you don't like it, do something else that you do like. Hopefully, this will work!

I checked out the scan. I actually like picture 3 in the negative of green-blue-green of this beautiful Benartex watercolor fabric that has been around for at least 10 years, I think.

And I have been invited out to lunch, so my plan of having a finished square in an hour goes out the door. Life is what happens between hours of having fun. :badgrin::badgrin::badgrin: I'm convinced God has a sense of humor.
 

Attachments

  • $1 Sulfur Rev 2 Butterfly.jpg
    $1 Sulfur Rev 2 Butterfly.jpg
    138.7 KB · Views: 12
  • $2 Sulfur Rev 2 Butterfly Placement issues.jpg
    $2 Sulfur Rev 2 Butterfly Placement issues.jpg
    58.4 KB · Views: 9
  • $3 Sulfur Rev 2 Butterfly Revised Templates.jpg
    $3 Sulfur Rev 2 Butterfly Revised Templates.jpg
    40.3 KB · Views: 18
I have a huge pile of 10 quilts just sitting here and it's time to take them to the Charity Bees Closet. I wish I had a picture of the tree one. It took 3 weeks in August, and I want a memory of it. :(

Well, not to worry. Things will work out. I need to measure and label each quilt now.

I was thinking of how to make labels:

Name of quilt_________________________
___________________________________
Pattern_____________________________
Color(s)_____________________________
___________________________________
Details______________________________
___________________________________
___________________________________
___________________________________
Width_________________________Inches
Length________________________Inches
Quiltmaker__________________________
Quilter______________________________
Date top done________________________
Date quilting done_____________________
Date bound__________________________
City or County________________________
State____________________Zip_________

Just getting ideas. If quilts come with maker, date, city and state, the discriminating collector believes it is worth double to know that. If you are making, quilting and binding the quilt, Date Done is all you need. The more that is known about the quilt, the better the savvy collector likes it. Today's machines with letters and embroidering capacity give machine owners a lot of options for quickly embroidering name, date, and location. Or all the details above. Otherwise, some quilters sew a small pocket at the lower edge of the quilt, place vital information about "Aunt Oma Janice Rawlinson Bender" on a piece of paper, slip it into the pocket in a waterproof, sealed bag, and hope it enlightens future family members who inherit the quilt. Collectors look for this rare advantage, and it's pay dirt for the resale of the quilt. Just sayin'. :eusa_whistle:
 
Last edited:
Huff-puff, huff-puff. Worked on that all afternoon! Got to the end of the stack, too, after agonizing over measuring the longer ones that I neglected to do when finished. Half of the quilts were marked, it was a chore.

I found in a box a quilt I got on ebay, but it was so not clean I needed to launder it and repair the seams that were falling apart. To my glee, I found some of the star centers look like spiderwebs when scanned on an 8.5x11" scanner bed. So below are results of the only part of the last 5 hours I really enjoyed. ;)

1 center web, really old quilt (70 or 80 years old, maybe?) Older? later? :dunno:
2 star points
3 my border added in 2010, then the quilt was boxed off the table for when company came. What a deal!
 

Attachments

  • $Vintage Strip Lemon Star1, summer colors.jpg
    $Vintage Strip Lemon Star1, summer colors.jpg
    111.1 KB · Views: 10
  • $Vintage Strip Lemon Star2, summer colors.jpg
    $Vintage Strip Lemon Star2, summer colors.jpg
    122.4 KB · Views: 9
  • $Vintage Strip Lemon Star3, summer colors.jpg
    $Vintage Strip Lemon Star3, summer colors.jpg
    141.6 KB · Views: 9
Last edited:
Randomly chosen centers from the middle of the quilt, placed on scanner, and scanned:

Scan 1: Random Scrap Star spider web center

Scan 2: Another random Scrap Star spider web center

Scan 3: Yet another random Scrap Star spider web center
 

Attachments

  • $Vintage Strip Lemon Star6, summer colors.jpg
    $Vintage Strip Lemon Star6, summer colors.jpg
    121 KB · Views: 8
  • $Vintage Strip Lemon Star5, summer colors.jpg
    $Vintage Strip Lemon Star5, summer colors.jpg
    119.1 KB · Views: 13
  • $Vintage Strip Lemon Star4, summer colors.jpg
    $Vintage Strip Lemon Star4, summer colors.jpg
    119.3 KB · Views: 13
Thanks, Mr. H. I took a half hour off and watched Deborah Fell's interview. She's really gotten off into the art sector. I'm going there when I get this year's 100 charity quilts done. I was going to turn them in this afternoon, but I worked to past 5 pm cataloguing and unfolding, measuring, refolding. What a chore it was. I took the labels above and printed a slew of them off on the printer. Six of the quilts had to be looked up for the names I gave them here, so I'm glad they let me keep using this little thread to keep track of loose ends. It seemed to be an endless boring bunch of stuff if you get my drift.

I'm going about it in a different way, though. There's a product out that is stiffening for hats but easier to quilt than buckrum, which has been the stuff of women's hat brims forever. Anyway, I'm going to do pen and ink on the sewing machine using thread instead of ink. I really love that media. I was doing that kind of work before I opened my shop and had to do things normal ladies like to do--applique, and <ugh> piecing! I've done my time doing traditional. It will be heaven getting back to the mind meld with a machine again. I've even done portraits with thread. However, I always loved pen and ink, blackwork, any kind of work where the background is still a little visible and the threads make glory. ;)
 
Wow. Good luck with all that. :thup:

Yeah Deborah is a hoot, especially when she gets a few beers in her LOL.
Her son and my son have been in the same band since high school.
I'm over 80 right now. I want them done before the middle of November. I want to play again! Soon.

Oh, wait. My work is play!

:)
 
Last edited:
Wow. Good luck with all that. :thup:

Yeah Deborah is a hoot, especially when she gets a few beers in her LOL.
Her son and my son have been in the same band since high school.
I'm over 80 right now. I want them done before the middle of November. I want to play again! Soon.

Oh, wait. My work is play!

:)
"I'm over 80 right now," means my goal of 100 quilts this year is over 80. I am not an octoagenarian! lol!!!

I've been cutting 2.5" strips for a Pink and Green Ladybug Quilt and finished 20 of them an hour before I got here. It takes some time to scan and reduce the size of the scan to fitting our board requirements.

Scan 1: Ladybug fabric designed by Anne Kelle for her collection Urban Zoologie at Kaurman Fabrics.

Scan 2: Block 1

Scan 3: Block 2
 

Attachments

  • $ebay urban zoologie bugs.JPG
    $ebay urban zoologie bugs.JPG
    52.3 KB · Views: 10
  • $Pink and Green Lady Bugs Quilt1.jpg
    $Pink and Green Lady Bugs Quilt1.jpg
    70.5 KB · Views: 13
  • $Pink and Green Lady Bugs Quilt2.jpg
    $Pink and Green Lady Bugs Quilt2.jpg
    58 KB · Views: 15
Last edited:
Scan 1: Block 3

Scan 2: Block 4

Scan 3: Block 5
 

Attachments

  • $Pink and Green Lady Bugs Quilt3.jpg
    $Pink and Green Lady Bugs Quilt3.jpg
    54.1 KB · Views: 23
  • $Pink and Green Lady Bugs Quilt4.jpg
    $Pink and Green Lady Bugs Quilt4.jpg
    62.2 KB · Views: 24
  • $Pink and Green Lady Bugs Quilt5.jpg
    $Pink and Green Lady Bugs Quilt5.jpg
    56.6 KB · Views: 26
Scan 1: Block 6

Scan 2: Block 7

Scan 3: Block 8
 

Attachments

  • $Pink and Green Lady Bugs Quilt8.jpg
    $Pink and Green Lady Bugs Quilt8.jpg
    69.8 KB · Views: 18
  • $Pink and Green Lady Bugs Quilt7.jpg
    $Pink and Green Lady Bugs Quilt7.jpg
    58.9 KB · Views: 19
  • $Pink and Green Lady Bugs Quilt6.jpg
    $Pink and Green Lady Bugs Quilt6.jpg
    50.7 KB · Views: 21
Scan 1: Block 9

Scan 2: Block 10

Scan 3: Block 11
 

Attachments

  • $Pink and Green Lady Bugs Quilt9.jpg
    $Pink and Green Lady Bugs Quilt9.jpg
    67.3 KB · Views: 18
  • $Pink and Green Lady Bugs Quilt10.jpg
    $Pink and Green Lady Bugs Quilt10.jpg
    59.4 KB · Views: 15
  • $Pink and Green Lady Bugs Quilt11.jpg
    $Pink and Green Lady Bugs Quilt11.jpg
    56 KB · Views: 18
Scan 1: Block 14

Scan 2: Block 15

Scan 3: Block 16
 

Attachments

  • $Pink and Green Lady Bugs Quilt14.jpg
    $Pink and Green Lady Bugs Quilt14.jpg
    71.9 KB · Views: 28
  • $Pink and Green Lady Bugs Quilt15.jpg
    $Pink and Green Lady Bugs Quilt15.jpg
    68.4 KB · Views: 17
  • $Pink and Green Lady Bugs Quilt16.jpg
    $Pink and Green Lady Bugs Quilt16.jpg
    70.2 KB · Views: 25
Scan 1: Block 12

Scan 2: Block 13

Scan 3: Block 17
 

Attachments

  • $Pink and Green Lady Bugs Quilt17.jpg
    $Pink and Green Lady Bugs Quilt17.jpg
    62.2 KB · Views: 21
  • $Pink and Green Lady Bugs Quilt13.jpg
    $Pink and Green Lady Bugs Quilt13.jpg
    71.8 KB · Views: 23
  • $Pink and Green Lady Bugs Quilt12.jpg
    $Pink and Green Lady Bugs Quilt12.jpg
    52.9 KB · Views: 21
Scan 1: Block 18

Scan 2: Block 19

Scan 3: Block 20
 

Attachments

  • $Pink and Green Lady Bugs Quilt18.jpg
    $Pink and Green Lady Bugs Quilt18.jpg
    73.1 KB · Views: 16
  • $Pink and Green Lady Bugs Quilt19.jpg
    $Pink and Green Lady Bugs Quilt19.jpg
    72.4 KB · Views: 22
  • $Pink and Green Lady Bugs Quilt20.jpg
    $Pink and Green Lady Bugs Quilt20.jpg
    63.3 KB · Views: 18
lady bugs!!!!
Do you like Ladybugs, Amelia?

Ms. Kelle did some in red, too. But I did red ladybugs on a quilt last year. Besides, I have a lot of green fabric I need to get rid of, and her green and pink ladybug fabric was the best coordinate.
 
Last edited:
This quilt is a great deal of fun. With all 20 of the 4-patch, 16-square blocks done, it's time to do the black-and-white windmill block that goes between each one. A sample square was made of 2 of the windmill blocks and 2 of the 4-patch, 16-square blocks. Both should measure 8.5." Unfortunately, I've only had my new Bernina a year and am not getting a scant quarter of an inch seam allowance. The 2.5" squares, 4 across and 4 down, should have sides that are exactly 8.5" Instead, they measure a little less, and they do so consistently. I should be using the single-hole plate, I guess. If that is the issue, it will fix the problem, because I hold the fabric exactly at the edge of the foot, and I'm still getting imprecise finished blocks. It could be that the 10 or 12mm hole is tugging a smidgen or two of fabric downward, creating a large quarter-inch seam allowance. I'll have to change the plate and see if the squares come out better.

In the meantime, here are the four blocks that were sewn together as best I could, ooching and scooching that 1/8" shortage, more and less, to come out to finish at roughly, eight inches. I despise imprecise work, but I am getting used to working around it. I've even considered cutting strips a smidgen wider, because I don't hate the large 1/4" seam allowance, it's just unfortunate they don't finish like my old Pfaff sewing machine did. If it's just a matter of meeting a specification by using a different plate, I will. The only trouble is, using a single hole plate is terrible if you switch from a straight stitch to a zig-zag stitch of any width whatever. :eek:

Scan 1 windmill on one side

Scan 2 4 blocks at center point between 4 squares

Scan 3 windmill on other side
 

Attachments

  • $Pink and Green Lady Bugs Quilt21.jpg
    $Pink and Green Lady Bugs Quilt21.jpg
    85 KB · Views: 17
  • $Pink and Green Lady Bugs Quilt23.jpg
    $Pink and Green Lady Bugs Quilt23.jpg
    89.3 KB · Views: 27
  • $Pink and Green Lady Bugs Quilt22.jpg
    $Pink and Green Lady Bugs Quilt22.jpg
    84.7 KB · Views: 14
Last edited:

Forum List

Back
Top